Conquering the Witness: A Comprehensive Guide to Destiny 2's Salvation's Edge Final Raid Encounter
Confront the Witness in Destiny 2 Salvation's Edge raid—a thrilling, multi-phase boss fight demanding skill, strategy, and teamwork.
The climactic confrontation with the Witness in Destiny 2's Salvation's Edge raid represents the culmination of the Light and Darkness saga, a battle for the fate of the Traveler itself. From the very inception of the raid narrative, it was evident that this cosmic entity would serve as the ultimate adversary, far too formidable to be vanquished within the confines of a standard campaign. Before the combined forces of the Sol System can hope to destroy the Witness, they must first sever its metaphysical grip on the Traveler—a task that defines the perilous final encounter of Salvation's Edge. After navigating the raid's fourth encounter and a brief platforming section, Guardians ascend an elevator to a grand chamber, coming face-to-face with the Witness as it prepares to unleash the universe-altering Final Shape. This is a challenging, multi-phase boss fight, but Guardians who have mastered the Verity encounter possess the foundational skills necessary to overcome this ultimate test.
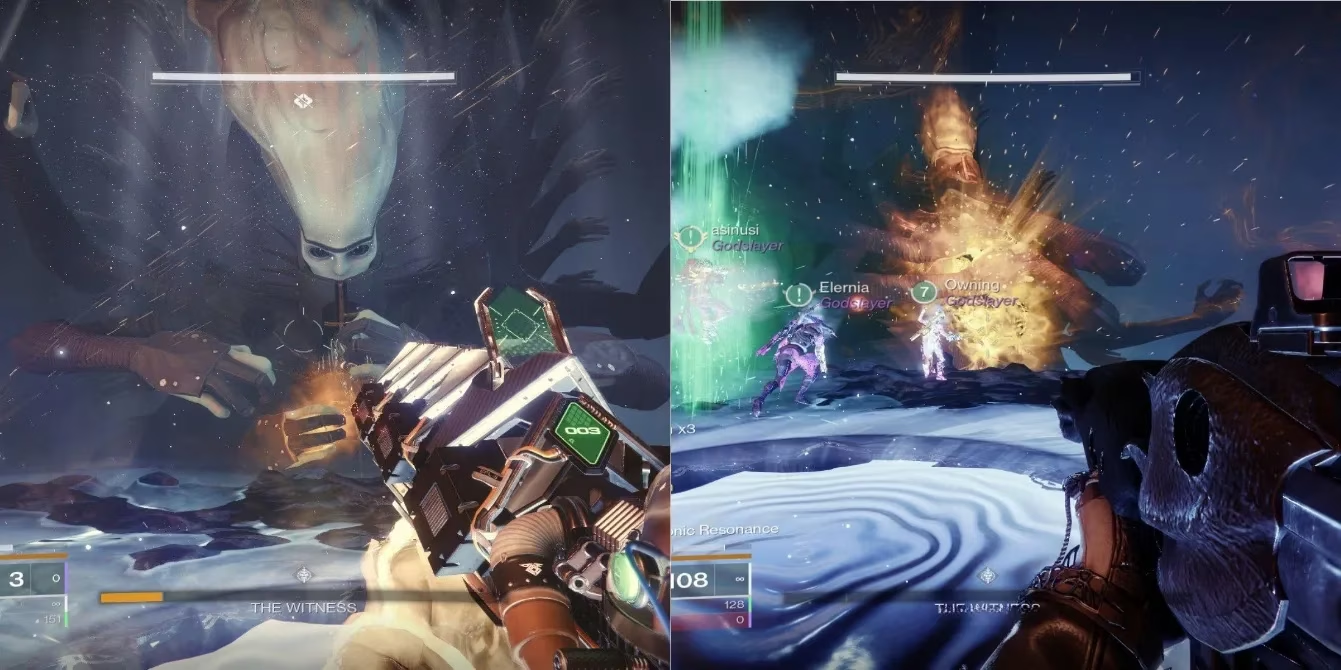
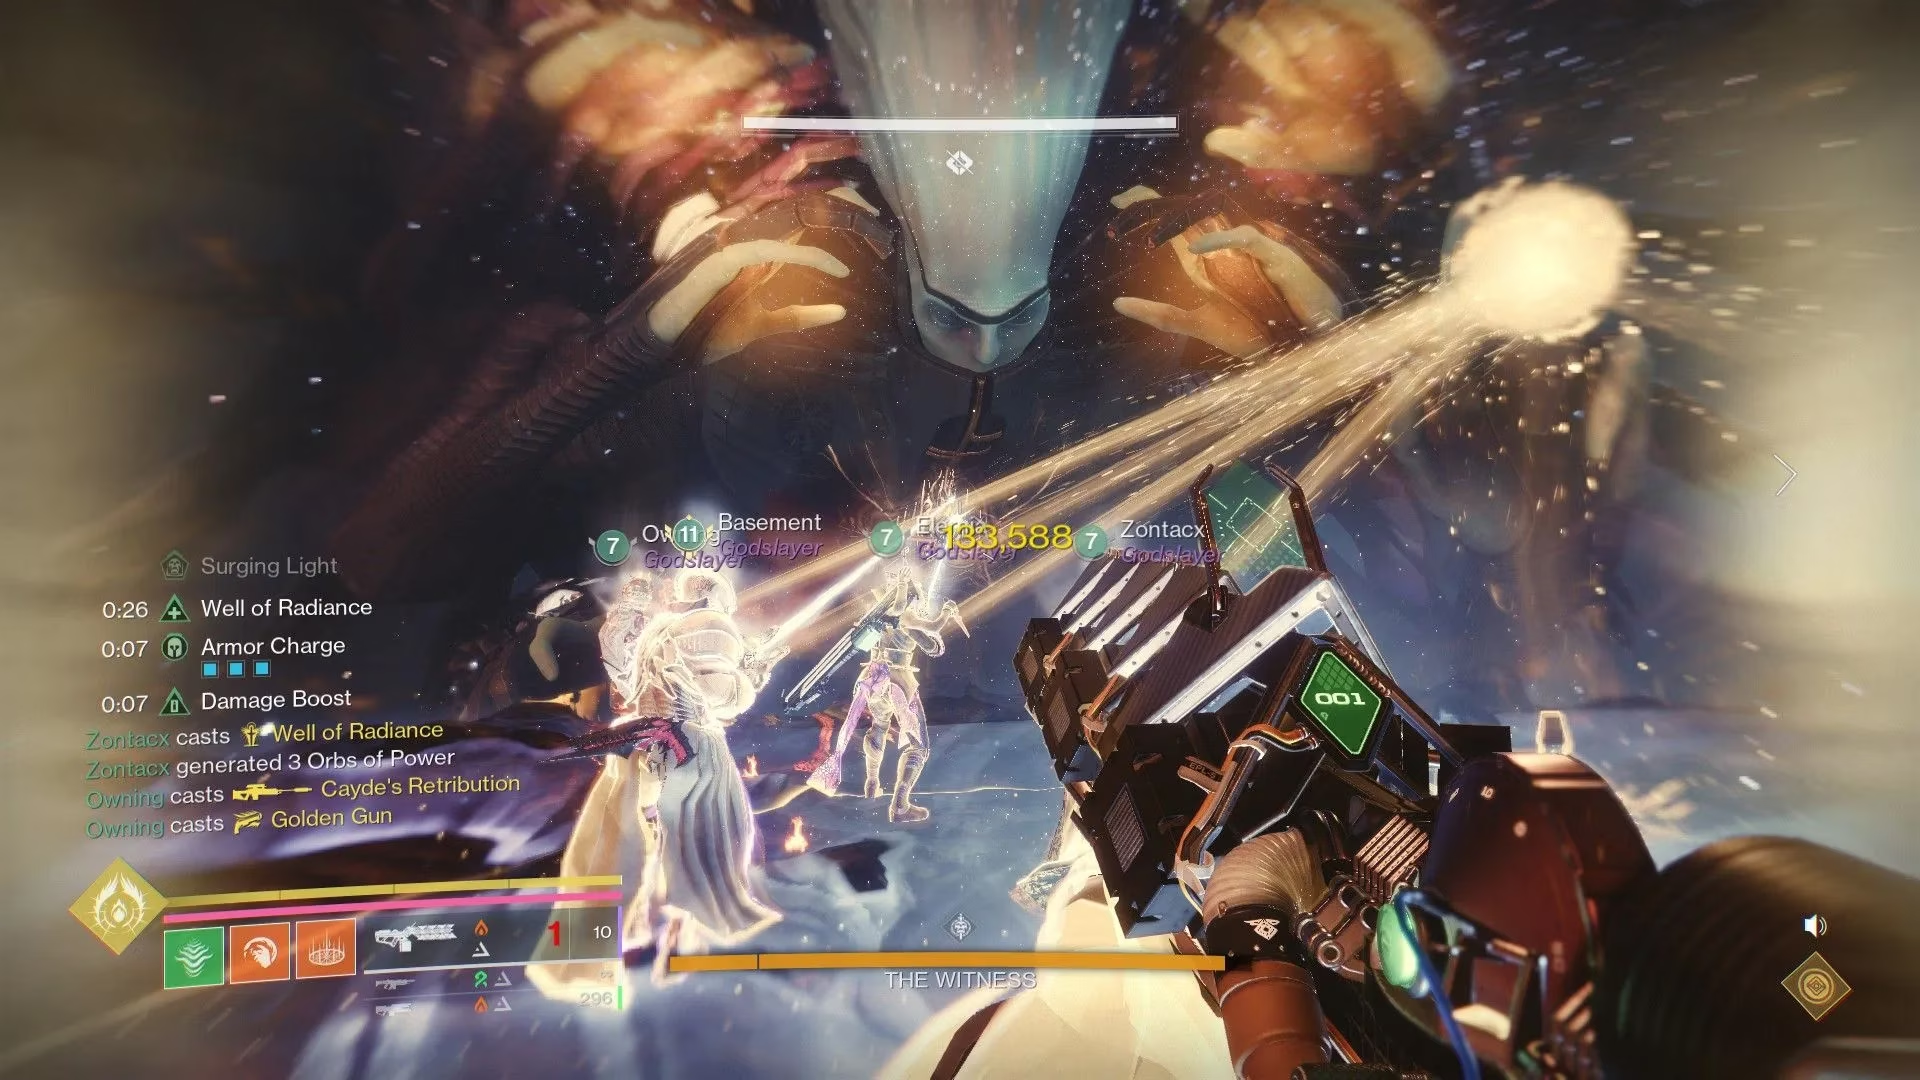
Preparation is paramount for this intricate engagement. The raid team must be strategically divided into two groups of three players each. One fireteam is responsible for managing the hostile adds, or additional enemies, on the left side of the arena, while the other handles the threats spawning on the right. As the confrontation commences, Guardians will immediately recognize the spectral hands of the Witness from earlier encounters, now performing their signature attacks with renewed purpose and lethality. These onslaughts are no longer mere environmental hazards; they are integral mechanics central to the encounter's progression. Players must also take careful note of the distinct circles adorning the Witness's torso, as these will become primary targets.
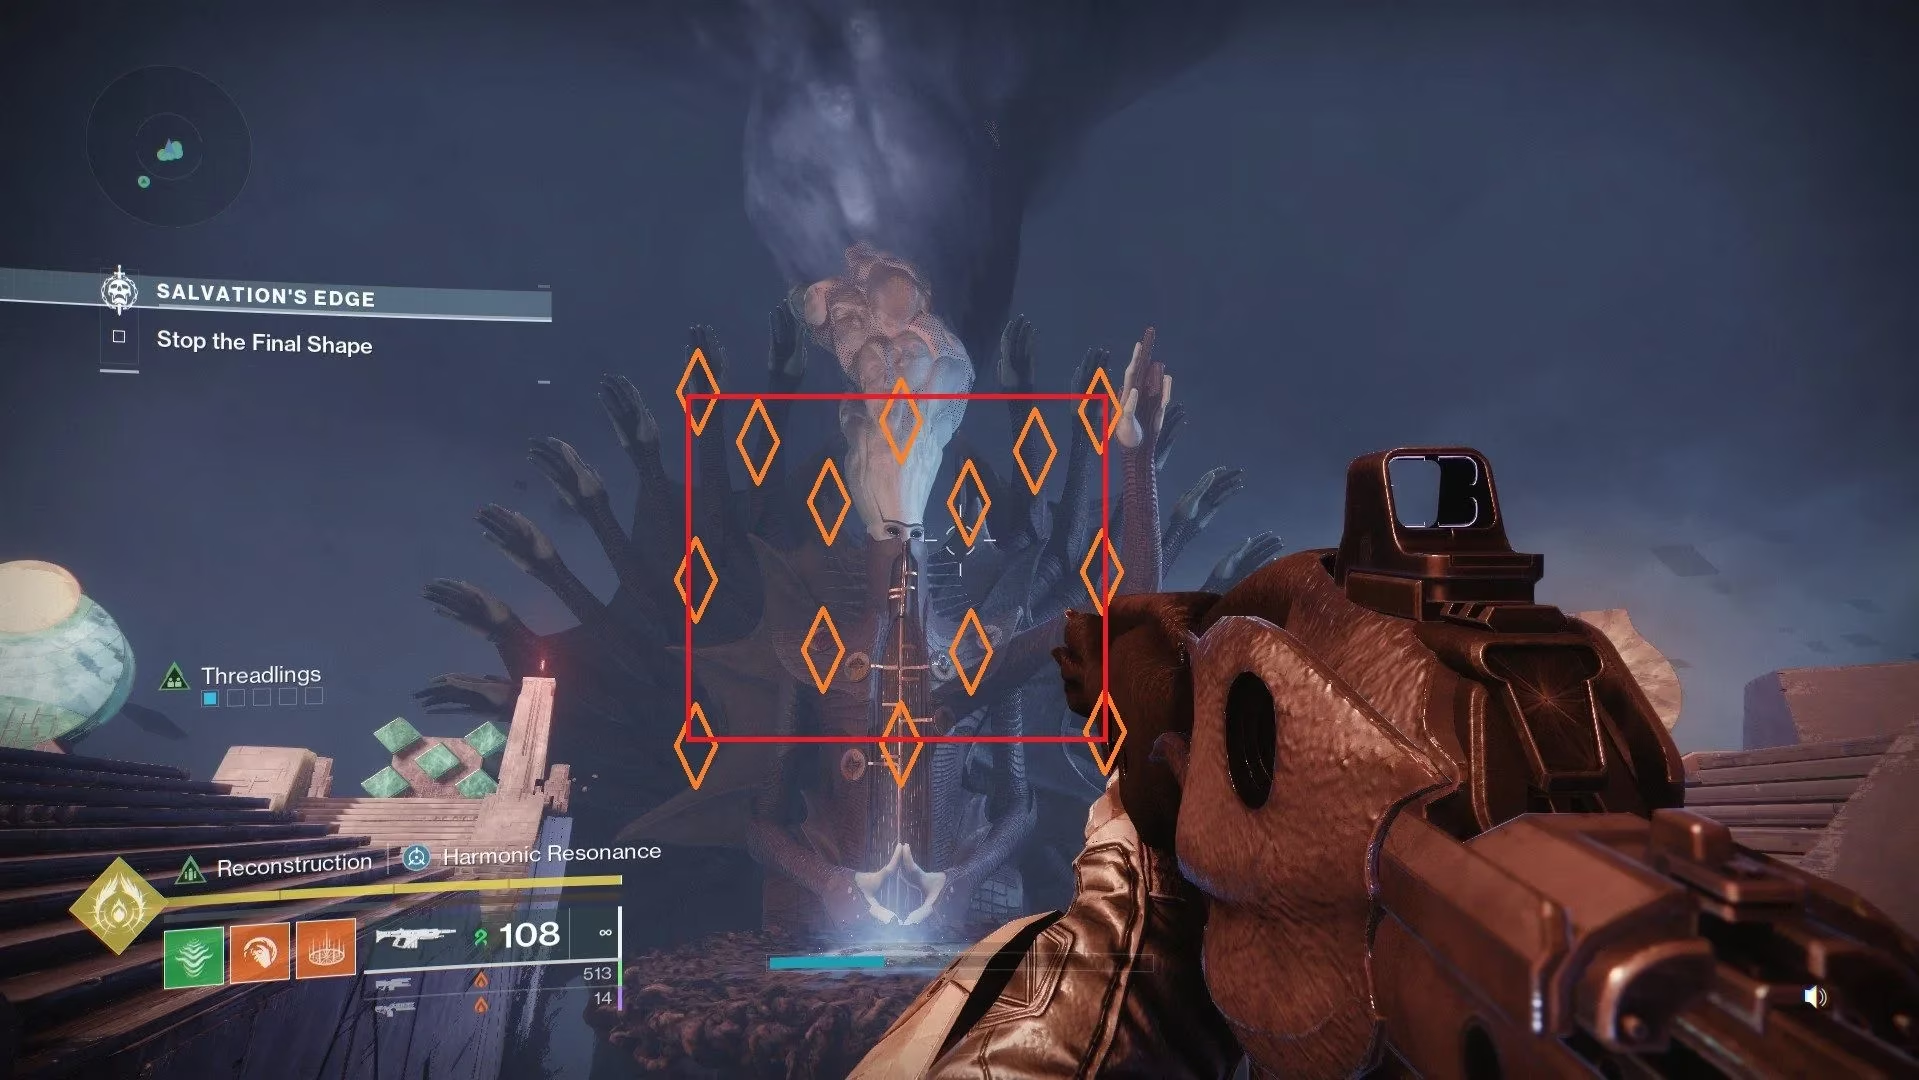
Engaging with the Witness's hand attacks requires precision and timing. By standing within the area-of-effect patterns long enough, a Guardian will acquire one of the three Resonance buffs—Square, Circle, or Triangle—familiar from previous raid segments. However, prolonged exposure is fatal, as the attacks inflict significant damage. If a player inadvertently gains an unwanted buff, it can be cleansed by standing in the energy field on the wooden platform, which later serves as the stage for the damage phase. Beyond acquiring the buff, Guardians must also remain in the attack zone long enough to deal sufficient damage to the manifesting hand itself. Dealing enough damage will temporarily incapacitate the hand, causing it to reveal two critical pieces of information on its wrist: a color and a symbol.
This revelation is the key to progression. The color indicates which specific Resonance buff is required to permanently destroy that hand:
-
🟥 Red Wrist Glow = Requires the Square Resonance buff.
-
🟨 Yellow Wrist Glow = Requires the Circle Resonance buff.
-
🟩 Green Wrist Glow = Requires the Triangle Resonance buff.
Fortunately, before a hand unleashes its attack, it previews the symbol of the Resonance it will grant, allowing teams to plan their assignments. A Guardian with the correct, matching buff must then stand within that hand's attack field and damage it to achieve destruction. Upon successfully destroying a hand, a player must immediately descend to the center of the arena and fire upon one of the circles on the Witness's body. Destroying a circle spawns a powerful Subjugator miniboss that must be eliminated with haste to prevent overwhelming the team.
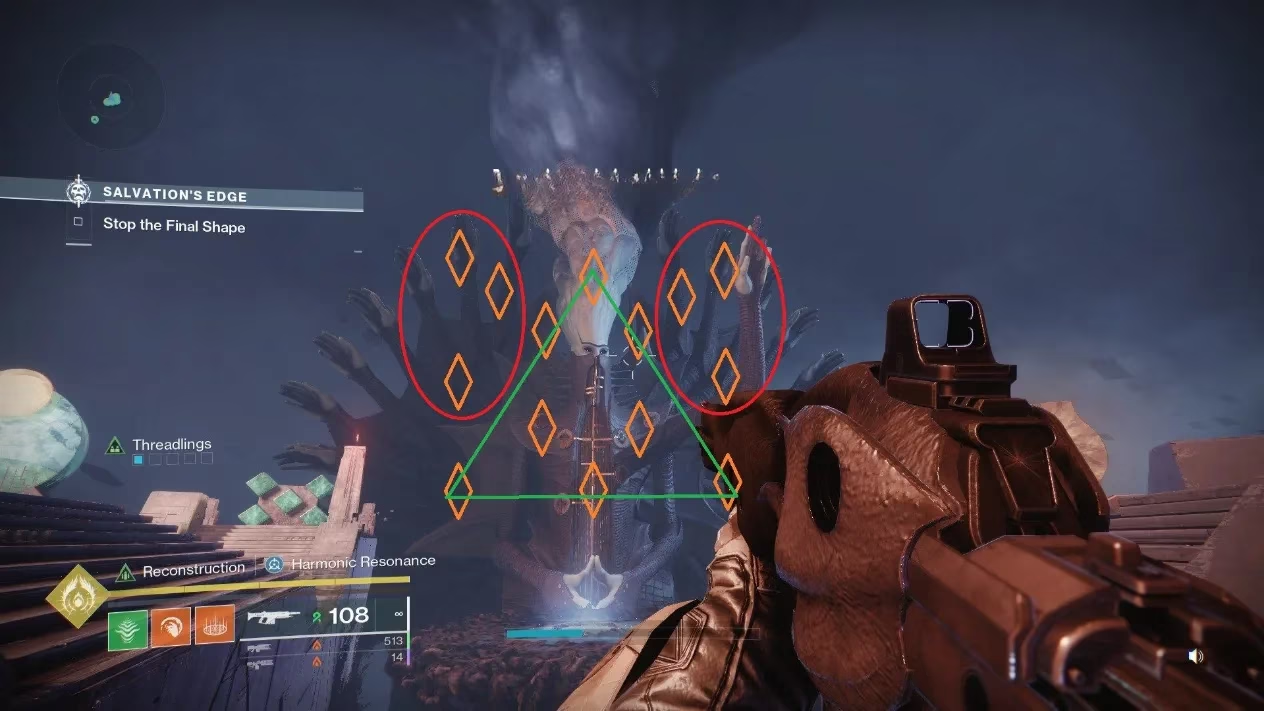
This cycle of hand destruction and circle targeting continues, granting the essential Glyphbreaker buff with each success. Periodically, a destroyed hand will glow with intense energy, triggering a critical test. A message, "The Witness tests you...," appears on-screen, and a constellation of dark nodes materializes in front of the entity. The raid team must collectively shoot and destroy enough of these nodes to form the specific geometric shape (Circle, Square, or Triangle) that was displayed on the last destroyed hand. Failure to create the correct shape results in an instantaneous, total team wipe.

Even success in this test does not grant respite. Guardians must instantly prepare to evade a devastating arena-wide assault. Teams must watch the Witness closely, listening for a distinctive metallic "shing" sound and observing its eyes as they begin to glow a malevolent yellow. The moment this occurs, every player must execute a well-timed jump and use their glide, lift, or dash ability to remain airborne, avoiding the lethal energy wave that sweeps across the ground for several seconds.
While a dedicated team handles these primary mechanics, the remaining Guardians have a crucial, continuous role: add control. The arena is besieged by relentless enemies, many of which wield Strand powers capable of pulling and suspending Guardians. Being yanked into danger at an inopportune moment—especially during a shape test or damage phase—can easily lead to a fatal mistake and cascade into a team wipe.
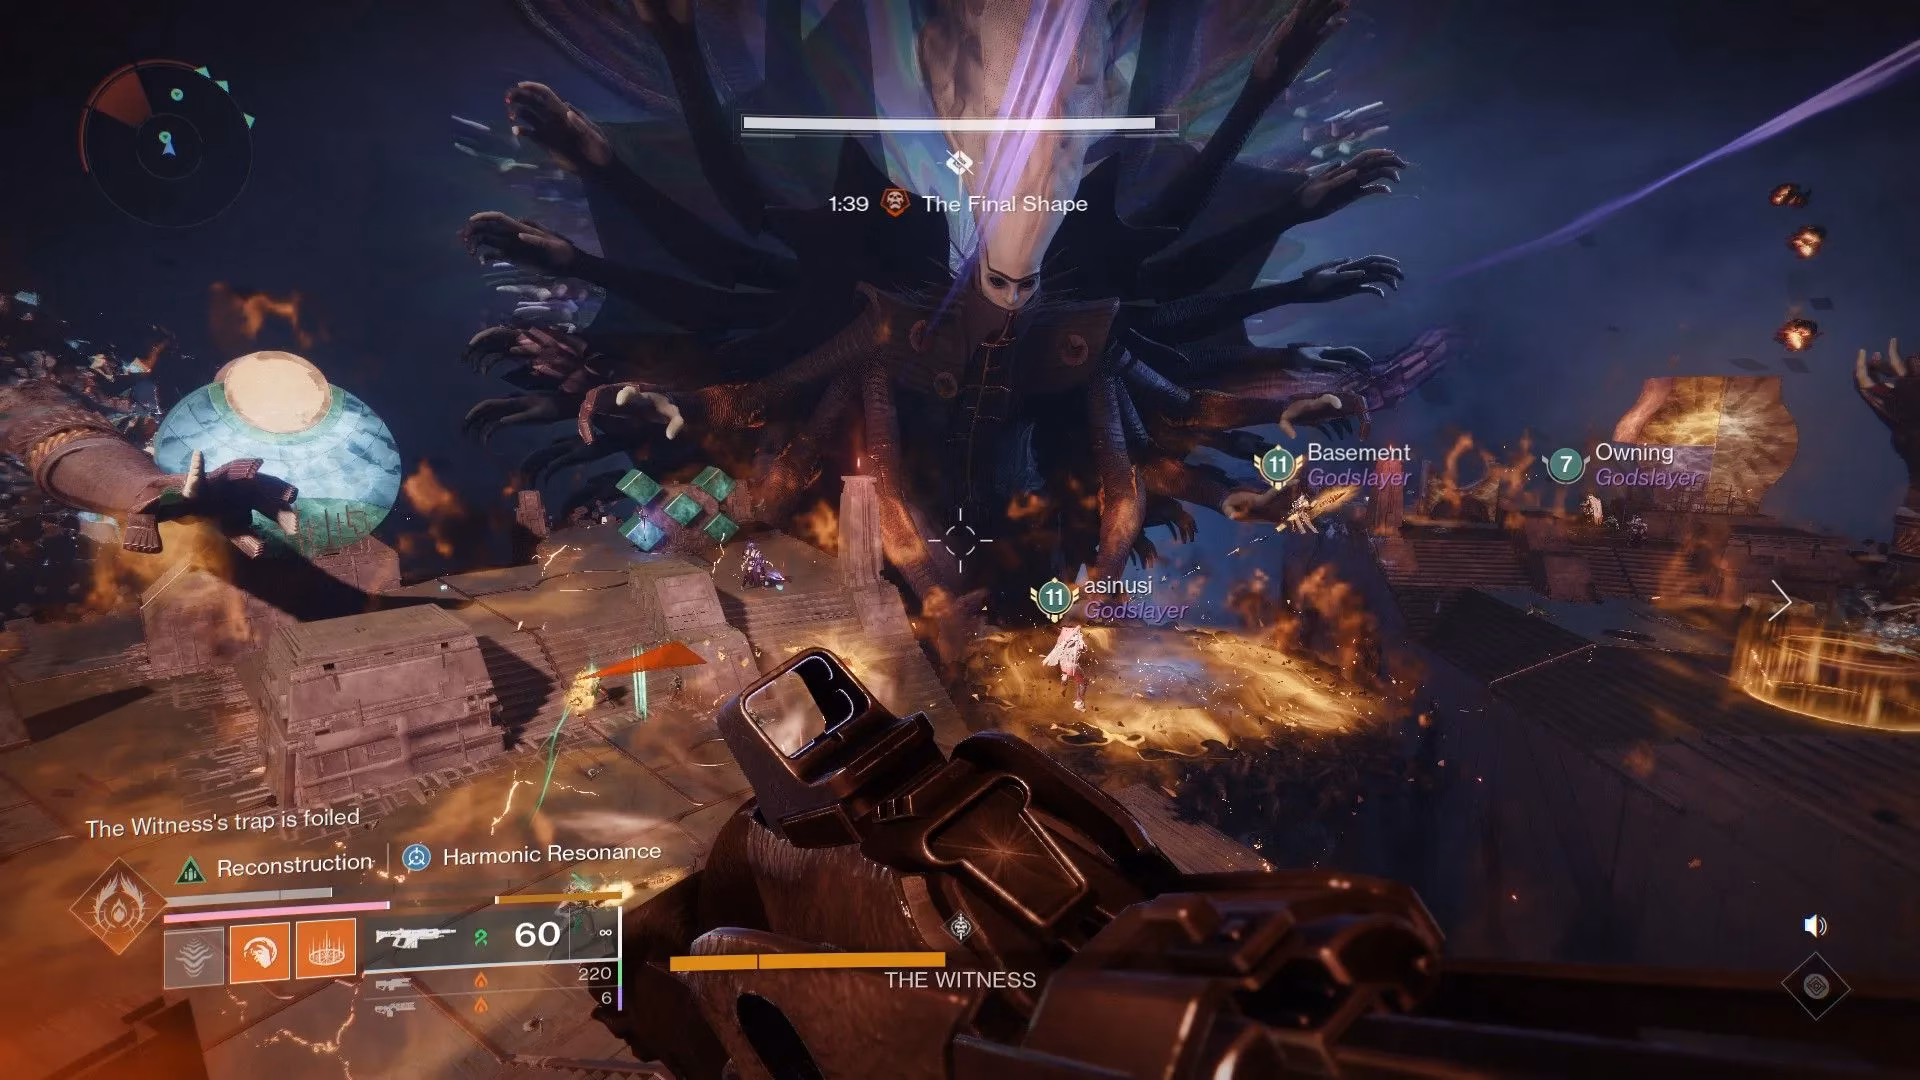
The ultimate goal of these phases is to trigger the damage window. This is achieved by destroying every circle on the Witness's torso. Once the final circle is shattered, the central wooden platform begins to ascend. All six Guardians must quickly congregate on this rising stage, reminiscent of the Rhulk encounter from the Vow of the Disciple raid. Here, a unique symmetrical battle unfolds: as Guardians enter their damage phase, so too does the Witness. Players must focus their heaviest firepower on the large, glowing crit spot on the entity's chest while simultaneously navigating a deadly barrage of its counterattacks.
Survival during this phase demands extreme spatial awareness. The ground beneath the platform becomes a lethal mosaic of attack patterns that players must constantly move to avoid. Furthermore, the Witness will intermittently repeat its full-arena ground sweep attack, requiring perfectly timed jumps from the entire team. These assaults are devastating and can eliminate Guardians even outside of Contest mode, making evasion absolutely critical. To maximize damage output, it is highly effective to designate one player as a "caller" to verbally direct the team's movement, allowing the others to concentrate their aim and abilities on dealing damage.
As the damage phase concludes, players must immediately evacuate the central platform to avoid being forcefully knocked off by the Witness's retaliatory strike. The team then resets, repeating the entire cycle of hand destruction, circle breaking, shape tests, and add clearance to trigger subsequent damage phases. True to Destiny raid tradition, the Witness employs a desperate Last Stand phase upon reaching critically low health. In this frenetic finale, the entity attacks with increased frequency and ferocity, realizing its impending defeat. Guardians must rally, burn through this final health segment, and secure the kill before the enrage timer expires.
Victory against the Witness is a monumental achievement, rewarding the fireteam with a unique emblem marking their triumph in Salvation's Edge. Furthermore, the most fortunate Guardians may also be blessed with the raid's exclusive Exotic weapon drop—a powerful tool forged from the conflict itself. This encounter stands as a masterful synthesis of Destiny 2's raid design principles, demanding flawless communication, mechanical execution, and adaptive combat prowess to overcome the saga's ultimate antagonist.