Destiny 2 Barrow-Dyad Exotic Mission Guide and Experience
Discover the thrilling Destiny 2 Derealize Exotic SMG quest in 2025's Episode: Heresy, blending intense solo combat, clever puzzles, and hidden secrets for adventurers.
As a dedicated Destiny 2 player, diving into the hidden Derealize mission in 2025's Episode: Heresy felt like uncovering a buried treasure chest on the derelict Dreadnaught. Seriously, this secret Exotic SMG quest is a gem for solo players, blending intense combat with clever puzzles that keep you on your toes. The thrill of sneaking through Taken portals and battling Hive forces solo? Man, it's pure adrenaline! And with no Champions to worry about, it's surprisingly forgiving if you've got a solid Heavy weapon for DPS. But don't let that fool you—the high enemy density and those pesky Tormentors can still pack a punch, making every run a test of skill. Overall, Barrow-Dyad isn't just a weapon; it's an adventure that whispers of Oryx's legacy, and unlocking it feels like cracking open a vault full of secrets.
How To Unlock Derealize
To kick things off, you need to hunt down an elusive Taken Portal in The Nether activity—dude, this part is like playing hide-and-seek in a cosmic maze! Once you spot it, jump in and follow the text prompt to snag a fragment, then haul it back to Eris' apartment to start the quest chain. From there, it's all about uncovering hidden fragments in Lost Sectors and tackling three curse challenges by lighting Hive altars inside the Dreadnaught. Honestly, the curse challenges are a bit of a grind, but the payoff is worth it. After completing them, you can launch Derealize from your Director under The Nether: Explore. 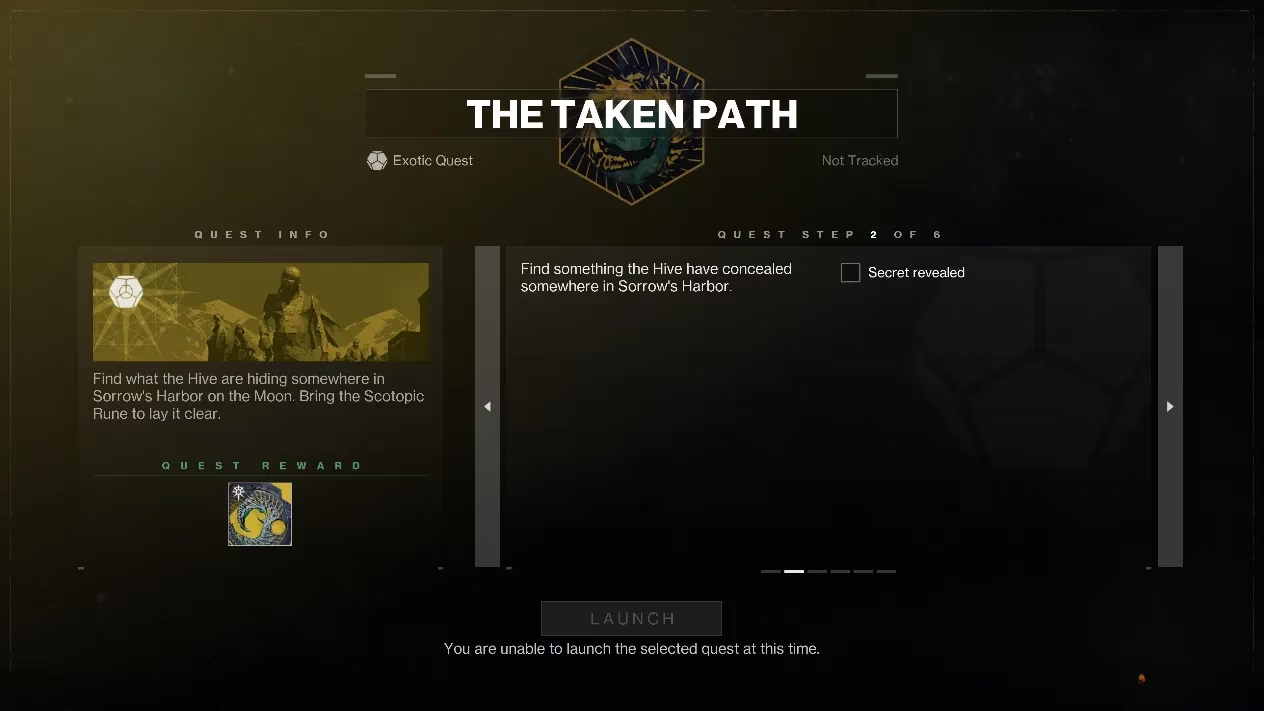 This image shows the eerie start of the quest, where the Taken energy feels almost alive, beckoning you deeper into the darkness.
Derealize Modifiers and Difficulty
Before jumping in, gear up smart! The mission is set at 2,015 Power with no Champions, but Overcharge and Surges (Arc and Strand) are enabled, giving SMGs and matching damage types a 25% boost. Threats include Arc damage, and shields are all over the place—yo, those Knights and Acolytes with extra shields? They're like armored tanks! The Epitaph modifier means Taken enemies spawn blight geysers on defeat, adding chaos to the battlefield. Subjectively, this feels slightly easier than an Expert Lost Sector, but the high enemy density and minibosses demand a loadout with healing, like Solar Restoration. Bring something for Tormentors and Subjugators—trust me, without constant HP regen, you'll be respawning more than fighting. 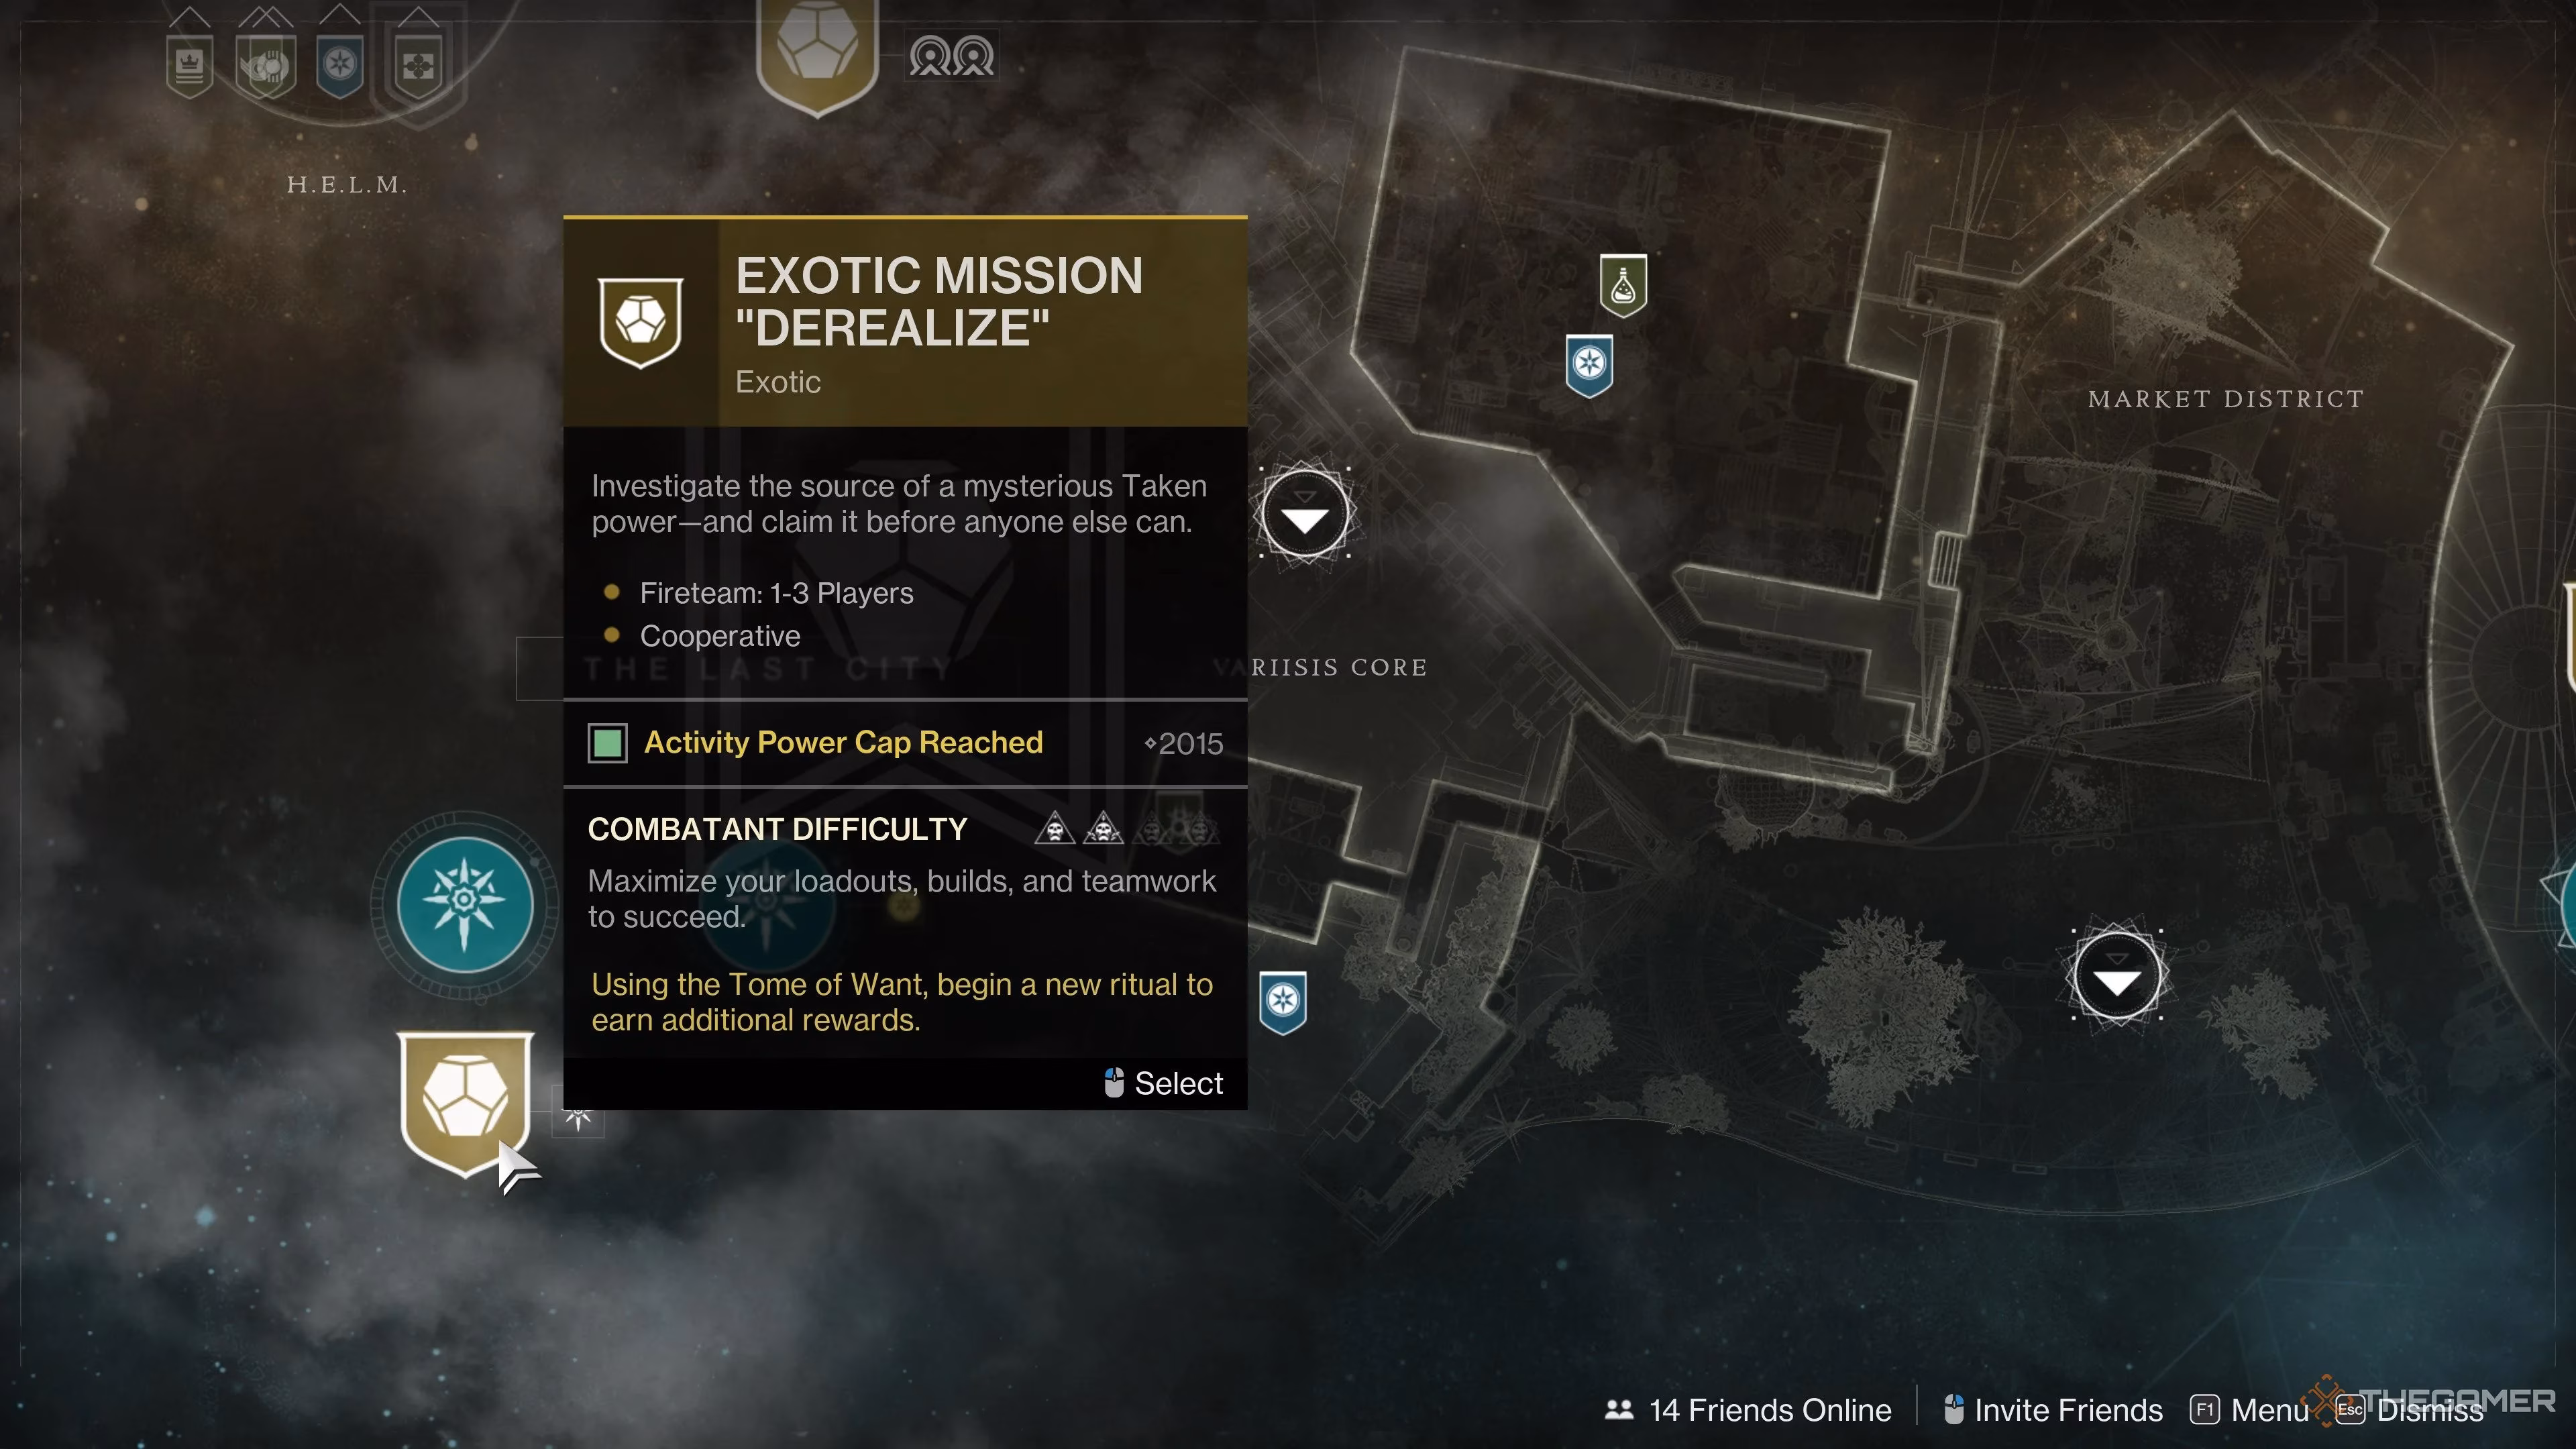 This icon hints at the mission's deceptive simplicity; it looks straightforward, but the Taken forces inside are anything but.
Key Mission Encounters
Get There First
Starting at The Mausoleum's floor bed, this opener is a warm-up with Subjugators, Tormentors, and Dread forces. No timer or revive limits here, so take your time—man, it's a great spot to test your add-clear builds. Clear the enemies to remove a Darkness resonance field protecting a portal, then hop through to the first real challenge. The path feels desolate, with the Dreadnaught's decay whispering tales of past battles.
Defeat Vrhiisk, Seeker Of Power
Vrhiisk, a hulking Subjugator, is guarded by a swarm of Taken minions. Phase him by dealing 10% damage, and he'll throw up an immunity barrier while summoning Ogres. Take them down to spawn a Taken relic—grab it, clear adds to charge it (anyone can get the kills), and deposit it to gain the Torn Between Dimensions debuff. Repeat with a second relic to break his shield. Dude, this encounter is all about add management; if you slack off, Vrhiisk's minions will overwhelm you in seconds. After depositing, focus fire on the boss—his vulnerability phase is short but sweet. 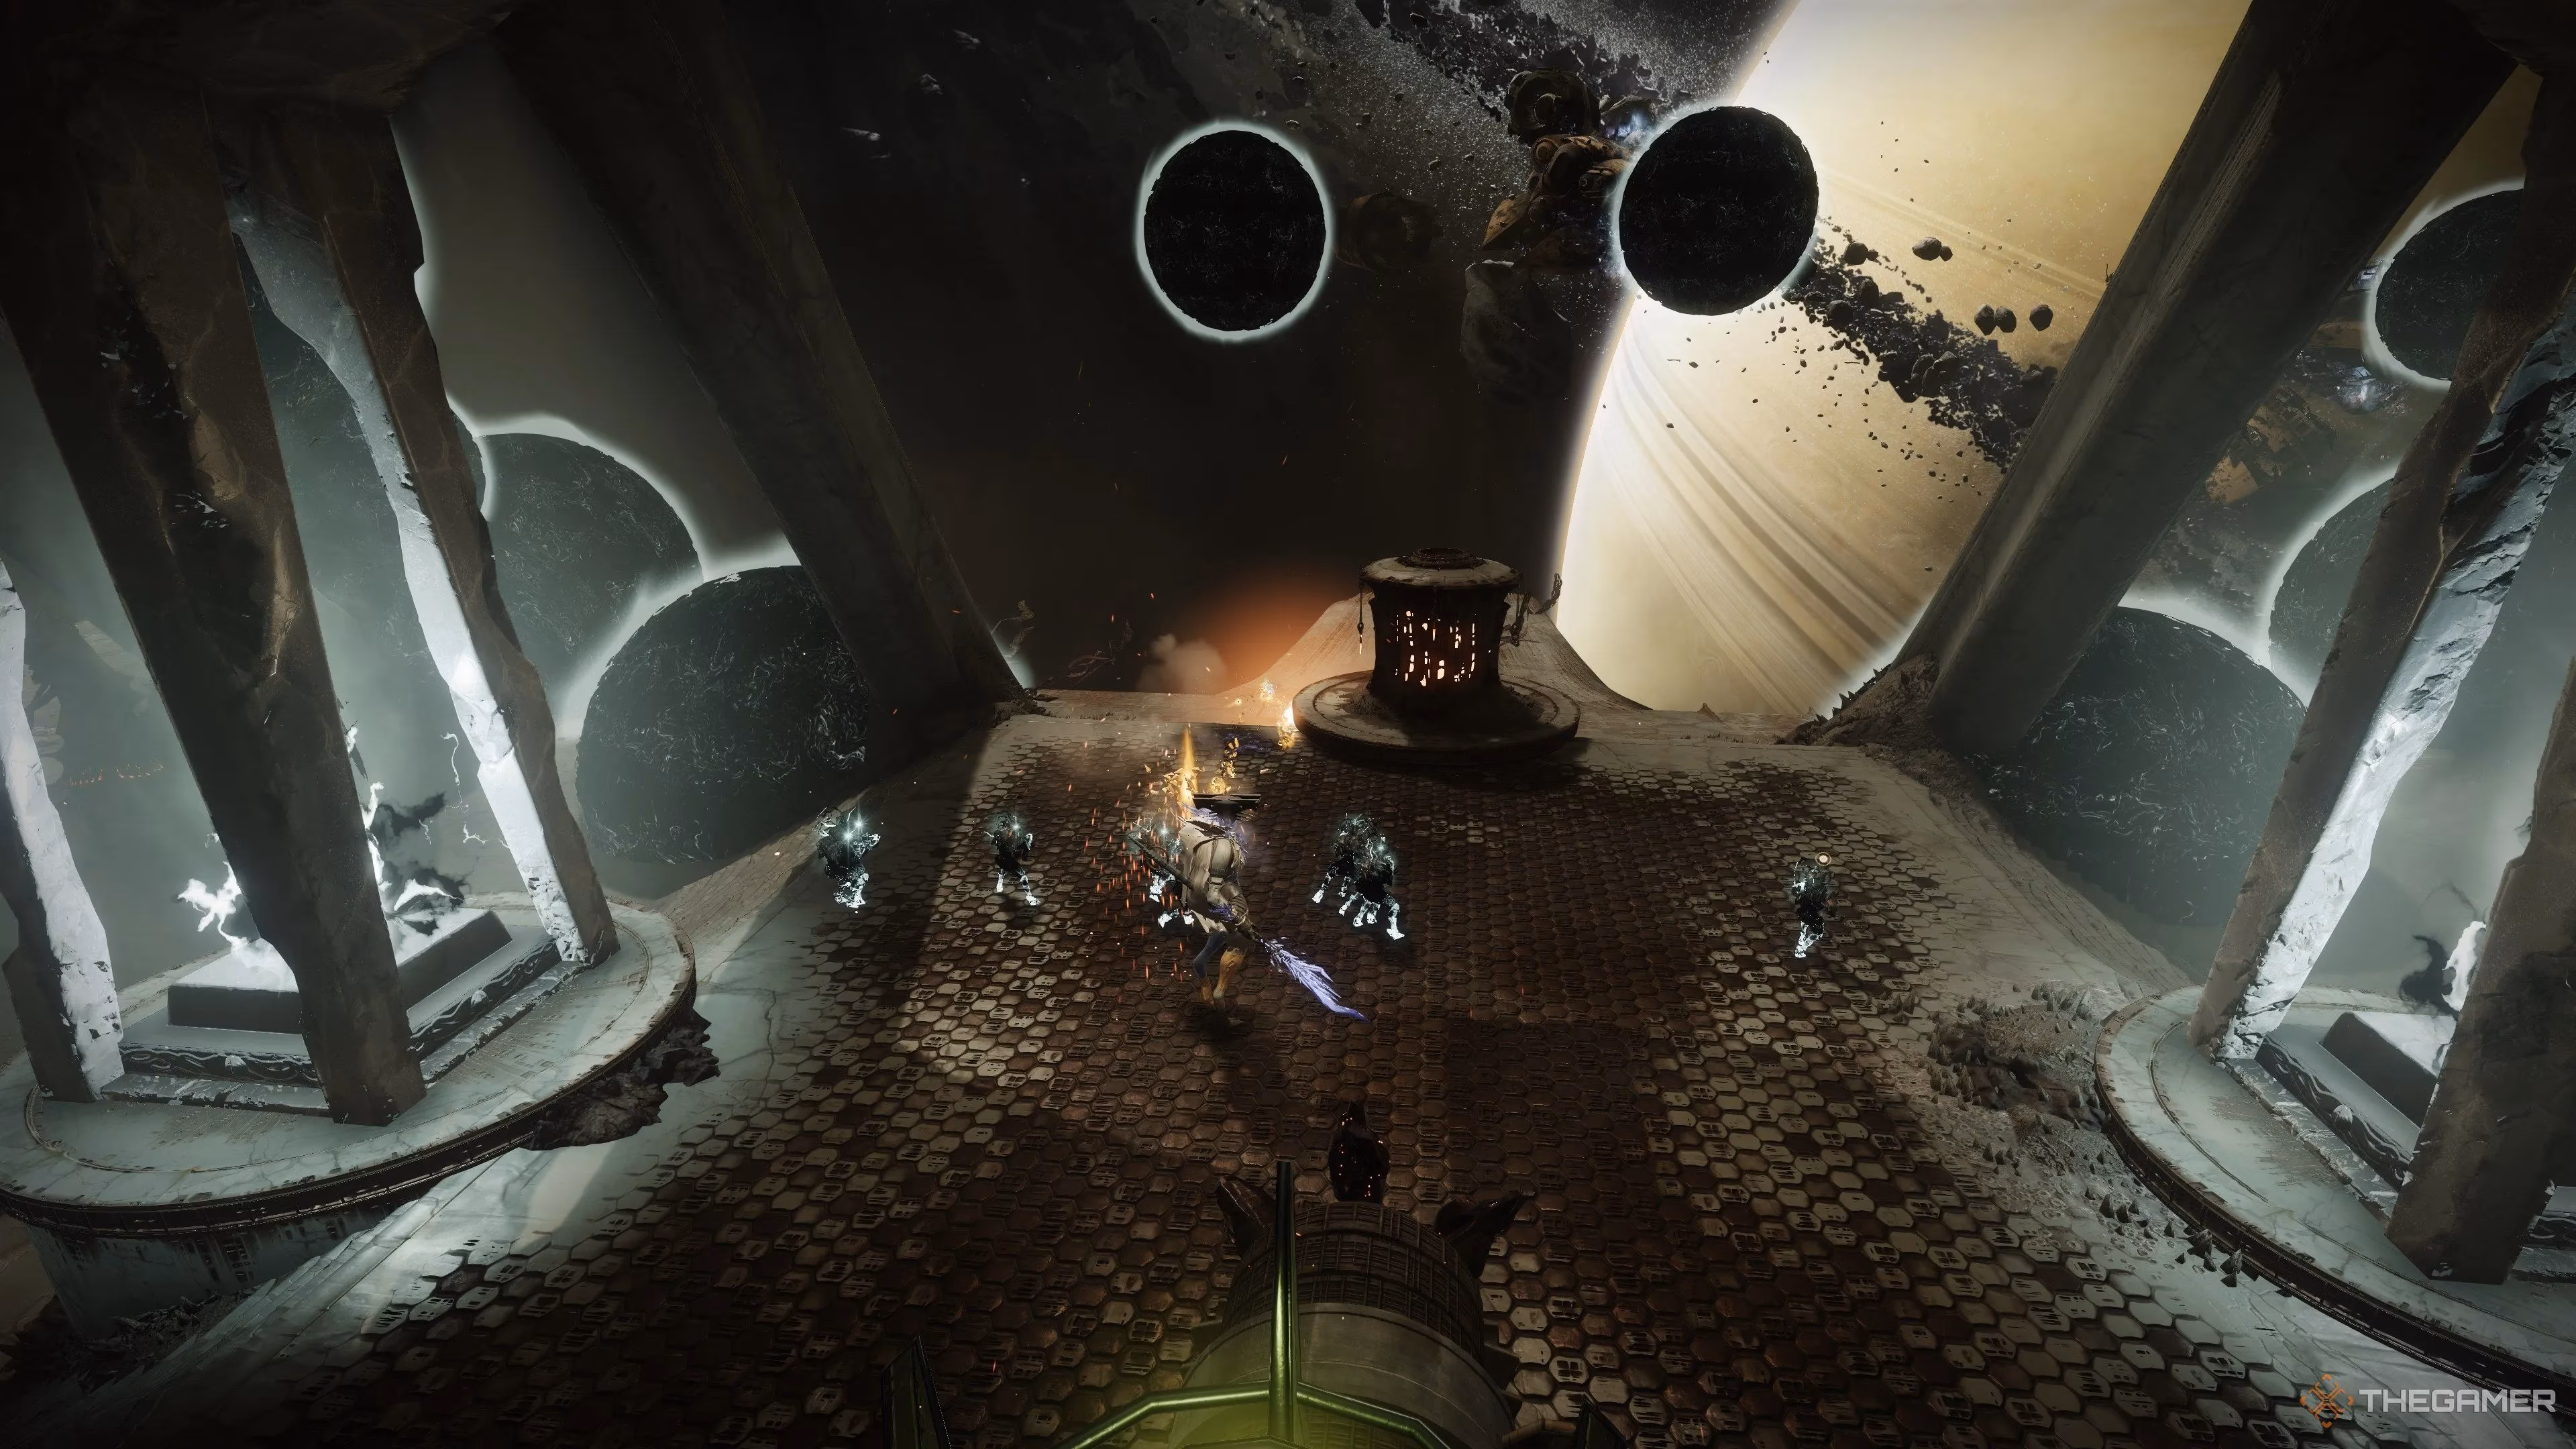 Vrhiisk looms large here, his form almost menacing as if he's guarding something precious.
No Escape Puzzle
After defeating Vrhiisk, you're trapped in a Hive jail with a rune-based puzzle. Four runes appear in sequence, and you must activate them in order by teleporting to rooms and standing on plates. The chevron on each plate points the direction to strafe—for example, if it points right, move right. If a room's rune isn't next in line, just wait to be teleported. Yo, this puzzle had me stumped at first, but once I got the hang of it, solving it felt like outsmarting a cunning opponent. The order varies, but in my run, it was counter-clockwise from the right. 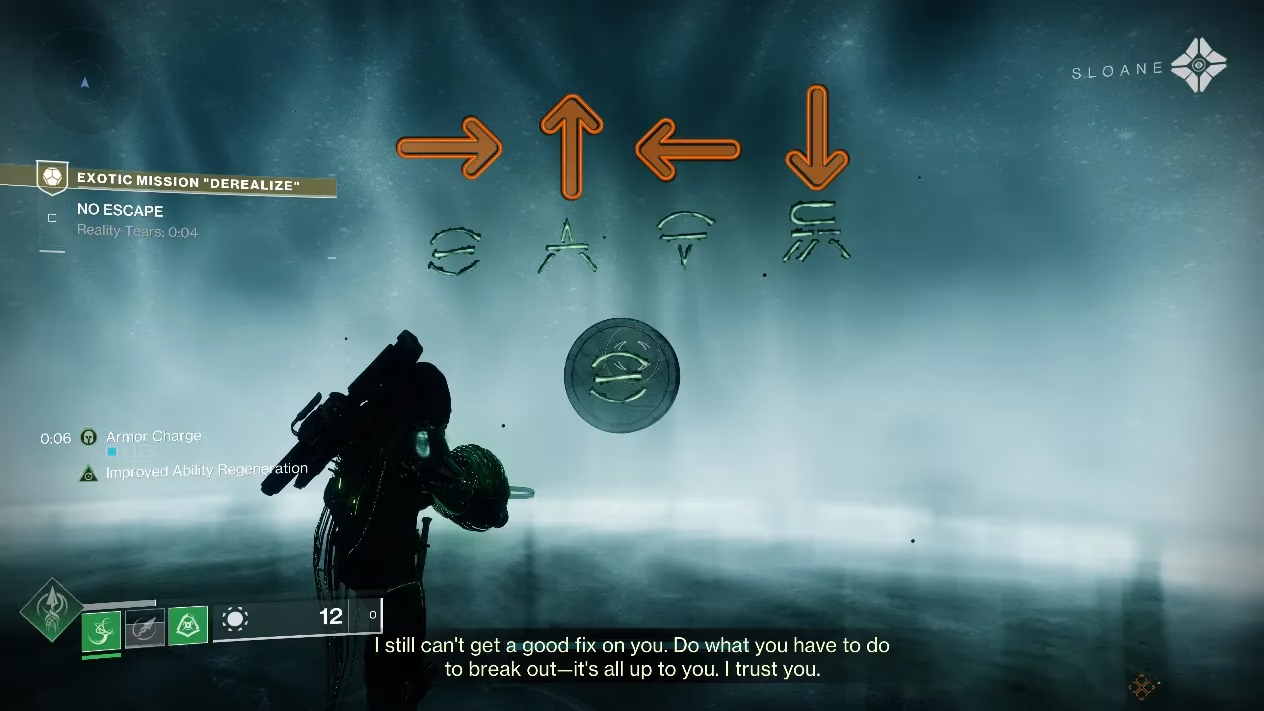 This solution image shows how the runes dissipate, leaving a sense of accomplishment as you escape.
Taken Energies Whisper Section
Navigate piston traps and dormant Hive structures by jumping through lit gaps in sack-infested walls. Some holes have pistons that shove you back, so tread carefully—man, it's like the walls themselves are alive and testing your agility! At the end, a Taken forcefield blocks the way; destroy three hidden Hive crystals (one left, two right) to breach it. Climb to the top and follow tentacles to the boss arena. The chasm here feels endless, with Taken energies hissing secrets that send shivers down your spine.
Defeat Xir-Kuur
The finale pits you against two Hive Knights—one in the material realm, one torn—guarding Barrow-Dyad. Alternate DPS phases between them, damaging Blights to remove immunity shields. The ground-level Knight is always vulnerable, so focus there while avoiding Taken-infested areas that deal DoT. Use high-DPS builds like Queenbreaker; Barrow-Dyad itself isn't ideal here. Once both are low, retreat to a Hive plate to seal the arena, enduring Suffocating Darkness stacks. Subjectively, this fight is intense but fair—with constant healing, it's a satisfying climax.  The Knights stand defiant, their presence echoing the Dreadnaught's ancient power.
After sealing the door, return to Eris' apartment to claim Barrow-Dyad and its crafting quest. But what lies beyond this? With the Dreadnaught full of untold secrets, could this mission be a gateway to even deeper mysteries? How will Barrow-Dyad's unique perks reshape the meta in future seasons? The possibilities feel endless, like the stars themselves are waiting to be explored...