Destiny 2: Into the Light - The Legendary Return of Zero Hour and Outbreak Perfected
The legendary Zero Hour mission returns in Destiny 2's Into the Light update, challenging Guardians with a thrilling reprisal of its brutal SIVA-fueled gauntlet. This ultimate guide provides the essential strategies and walkthrough needed to conquer the updated mechanics and claim the coveted exotic pulse rifle.
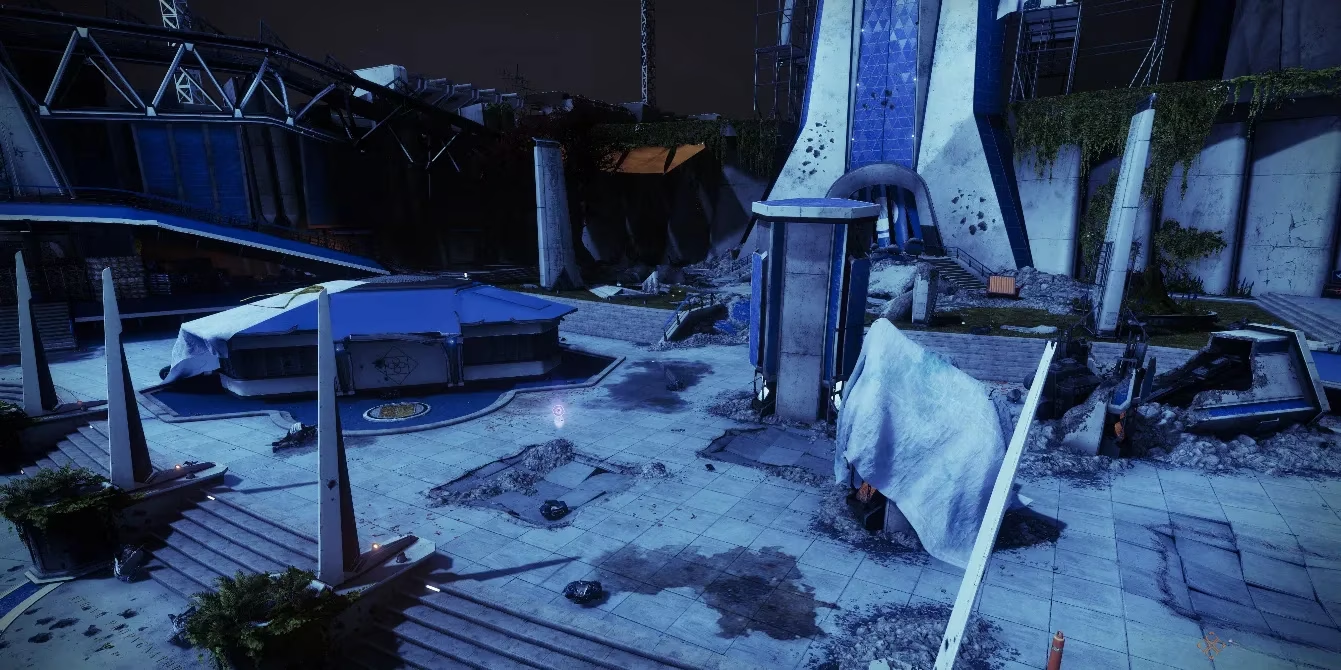
In 2026, the echoes of SIVA resonate once more through the Last City. With the Into the Light update, Guardians have been called back to a place of painful memory and legendary challenge: the original Tower, now a ruined husk overrun by House Salvation. This isn't just a nostalgia trip; it's a full-throttle reprisal of what many veterans still call the hardest Exotic mission in Destiny 2's history: Zero Hour. The Fallen have gotten their grimy hands on a critical piece of SIVA tech, and it's up to you to get it back, no matter the cost. The reward? A chance to craft the legendary, pulse rifle, one of the game's most potent weapons. But getting there? That's a whole different story, requiring precision, teamwork, and nerves of steel. It's time to suit up, Guardian. This is the ultimate guide to conquering Zero Hour and claiming your prize.
Getting Started: The Asset Protection Quest
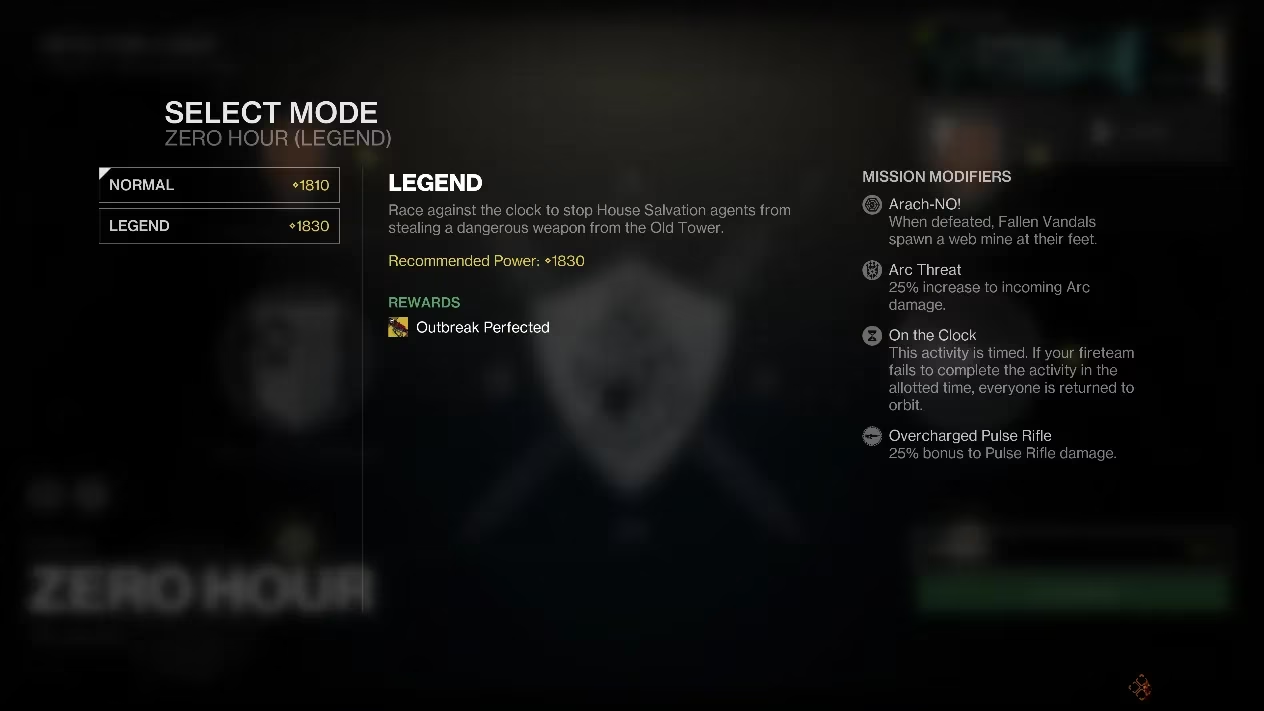
To dive back into this madness, you gotta talk to Ada-1 in the Tower. She'll hand you the "Asset Protection" quest, which is basically your ticket to the party. The mission itself is tucked away in the "Into the Light" node on your Director. The good news? No locked loadouts here. You can bring your favorite guns and gear, so go nuts. But don't get too comfortable. While the core mechanics are the same as the old days, Bungie has made some key updates:
-
Power Scaling: It's been brought in line with 2026's standards.
-
Time Limits: They've been adjusted. Normal mode gives you a generous 45 minutes, while Legend cranks up the pressure with a tight 20-minute, 40-second timer.
-
A Second Boss Phase: That's right, the final fight has an extra spicy surprise waiting.
-
Different Parkour: Normal and Legend difficulties have completely different jumping puzzle sections. If you're a veteran and get lost on Legend, don't panic; you're not going crazy.
The Walkthrough: From Ruins to the Vault
The mission kicks off in the hauntingly familiar ruins of the old Tower bazaar. Your first objective is simple: move. Fight through the initial Fallen resistance and find an air duct. This will be a recurring theme—when in doubt, look for a vent.
The Tower Plaza is your first real test. You'll face a small army of Shanks, Vandals, and a Brig miniboss. The key here is positioning. Use the plaza stairs for cover, take out the snipers first, and save your Heavy ammo for the big guy. Once the coast is clear, head to the opposite end and push into the hangar.
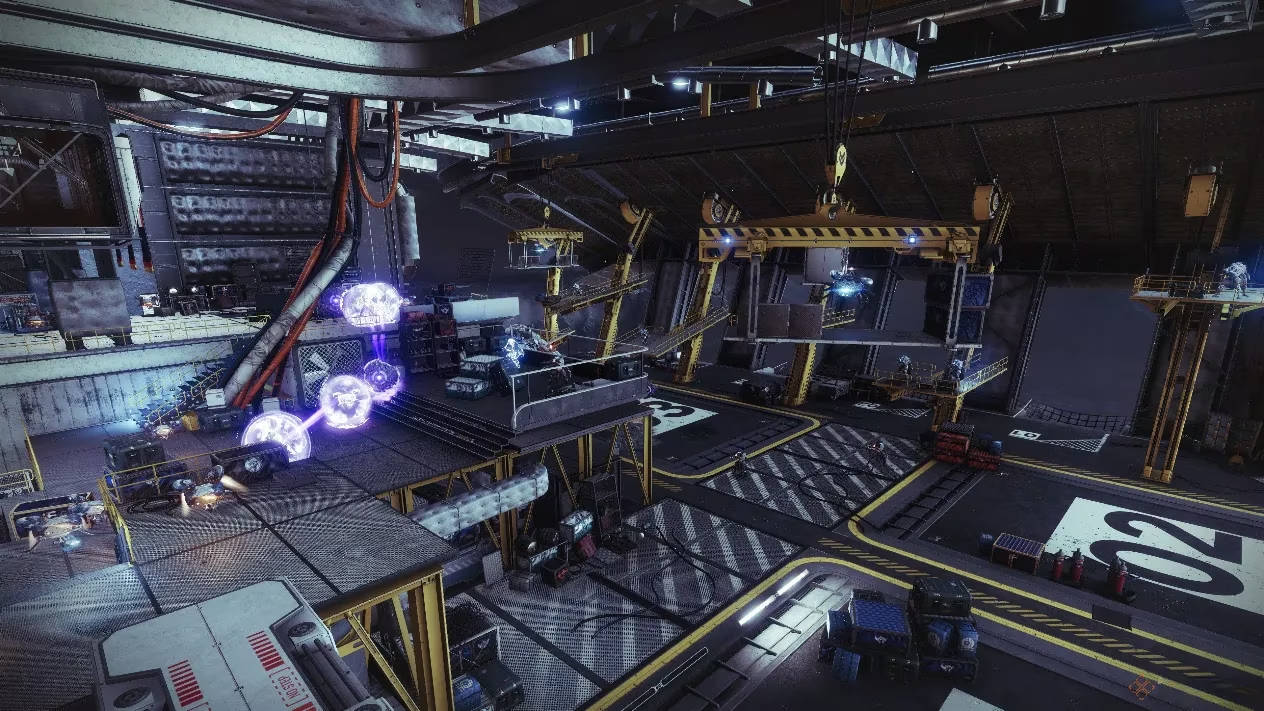
The Tower Hangar is a brutal, open combat arena. If you've been saving your Super, now's the time to pop it. Clear the upper balcony first, then deal with the Vandals across the way. At the far end, a Fallen Walker blocks your path. You must clear every enemy in this room to proceed, so don't hold back. After the Walker falls, run up the stairs behind it into the Tower proper. The path is linear but guarded. Use this section to recover ammo and abilities before you reach the elevator shaft marked with an "M." Jump down.
The Parkour Puzzles: Choose Your Path
This is where the paths diverge based on your chosen difficulty. On Normal, you'll navigate a series of spinning fans in a deep shaft. The trick is to land on the center of each fan, then leap into the red light pillars on the edge. Take it slow and watch for Explosive Shanks.
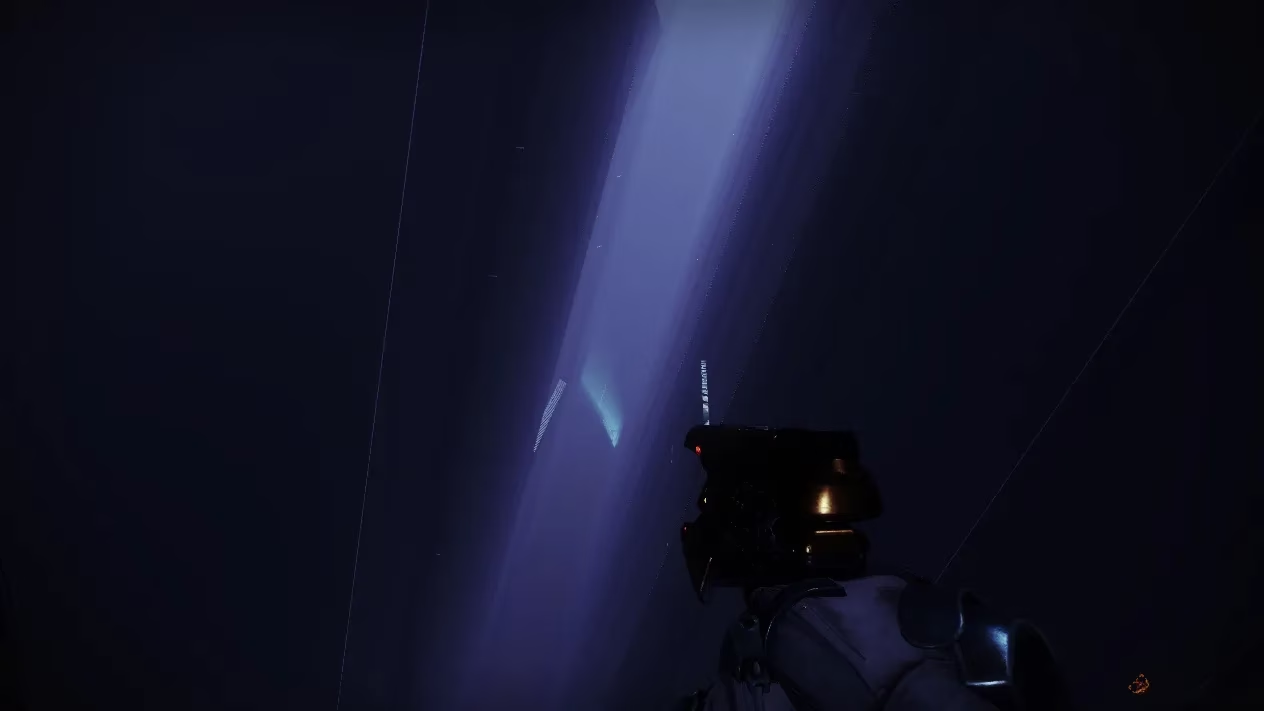
After the fans, you'll face a massive chasm. Jump onto the dimly lit platforms along the edge, slide down a ramp, and hit a switch to help your fireteam. Then, brace yourself for the stuff of nightmares: TR3-VR's Maze.
This claustrophobic labyrinth is patrolled by TR3-VR, a murderous cleaning bot. Your goal is to activate four switches on the edges of the maze. If you're in a team, split up. Your survival depends on finding the square cubbies in the walls to hide in when TR3-VR approaches. Move immediately after it passes. Flip all four switches and escape to the other side.
From there, it's a climb up broken elevators and metal supports, followed by a long, perilous slide down an air duct (stick to the middle!). You'll eventually drop into a room filled with gold. Turn around, find the hidden L-shaped pipes with a diamond symbol, and interact with the wall to reveal the path to the Cryptarch's Vault.
The Final Gauntlet: Floor Puzzle & Boss Fight
Before you can claim your prize, you must cross a 6x5 grid floor rigged to incinerate trespassers. You must walk the correct path; there are no shortcuts. The solution differs between Normal and Legend difficulties. Past this lies the final boss.
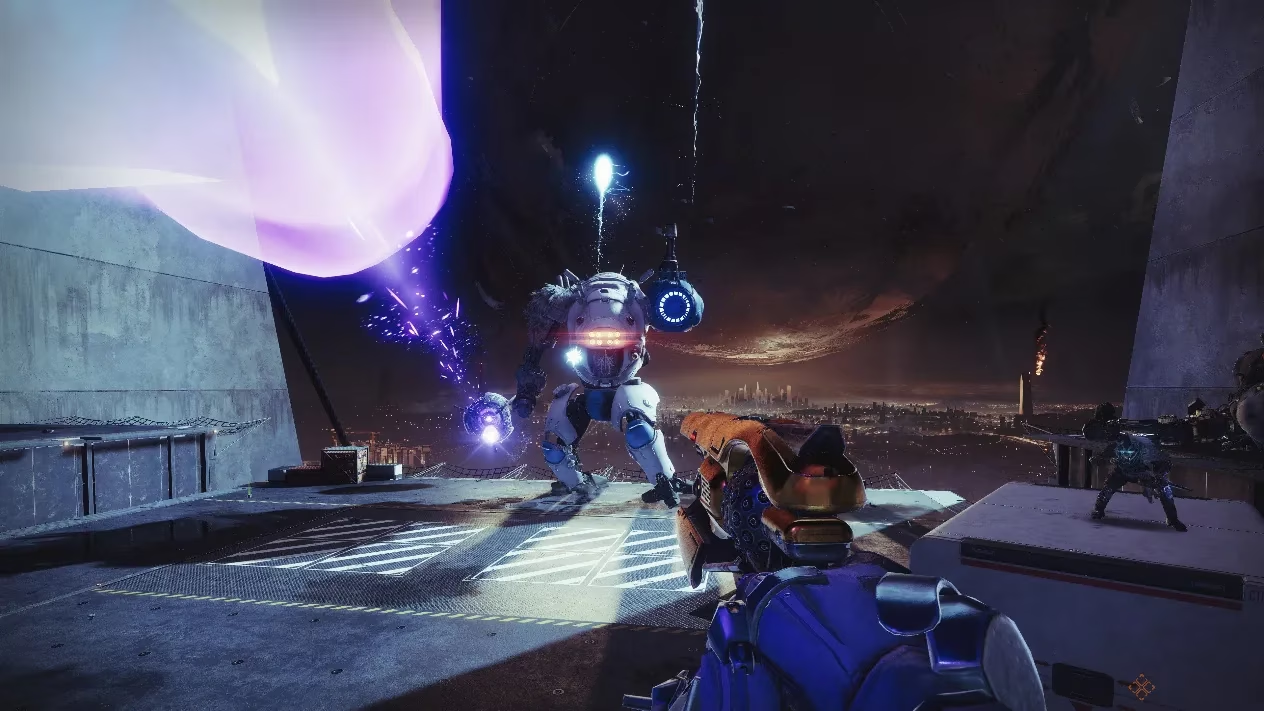
Waiting for you is Siriks of House Salvation, a massive, teleporting Fallen Vandal. The fight has two distinct phases:
-
Phase 1: Siriks teleports around the hangar, spawning waves of adds. Destroy the two turrets immediately—they will melt you. Every time you damage Siriks, they teleport and summon more enemies. Keep moving, clear adds, and chip away at the boss.
-
Phase 2: At 20% health, Siriks retreats and summons two Fallen Walkers. Destroy them, and Siriks returns piloting a Brig, surrounded by a small army. This gets chaotic fast. Use cover, clear adds with your Super, and focus explosive damage on the Brig. At around 30% HP, its headcase opens, exposing a critical weakspot. Switch to a precision weapon to finish the job.
Defeat Siriks, and the mission timer stops. Open the chest to claim your rewards, including the pattern for Outbreak Perfected. Return to Ada-1 to claim your new toy.
Unlocking Outbreak Perfected's True Potential: The Refined Quests
Getting the gun is just the beginning. To unlock its craftable perks, you must complete three Outbreak Refined quests from Ada-1, each requiring a run of Legend Zero Hour and specific actions.
| Quest | Initial Objective | Legend Zero Hour Switch Location | Reward |
|---|---|---|---|
| Outbreak Refined I | Collect SIVA Clusters in Cosmodrome | Covert Passage storage room (4 switches) | Rapid Hit |
| Outbreak Refined II | Eliminate Fallen in Exodus Garden 2A Lost Sector | Narrow chasm after the opened hatch (2 switches) | Rewind Rounds Retrofit |
| Outbreak Refined III | Eliminate enemies in The Devils' Lair strike | Tower wall parkour section (2 switches) | Headseeker |
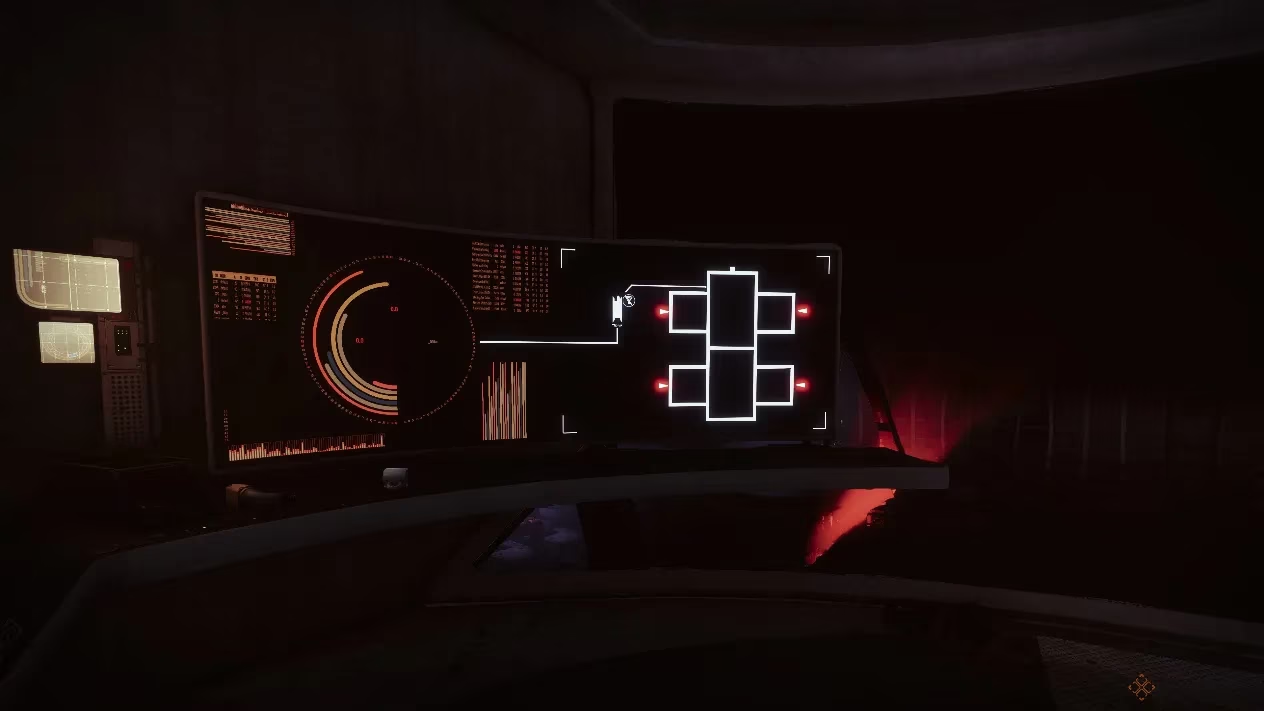
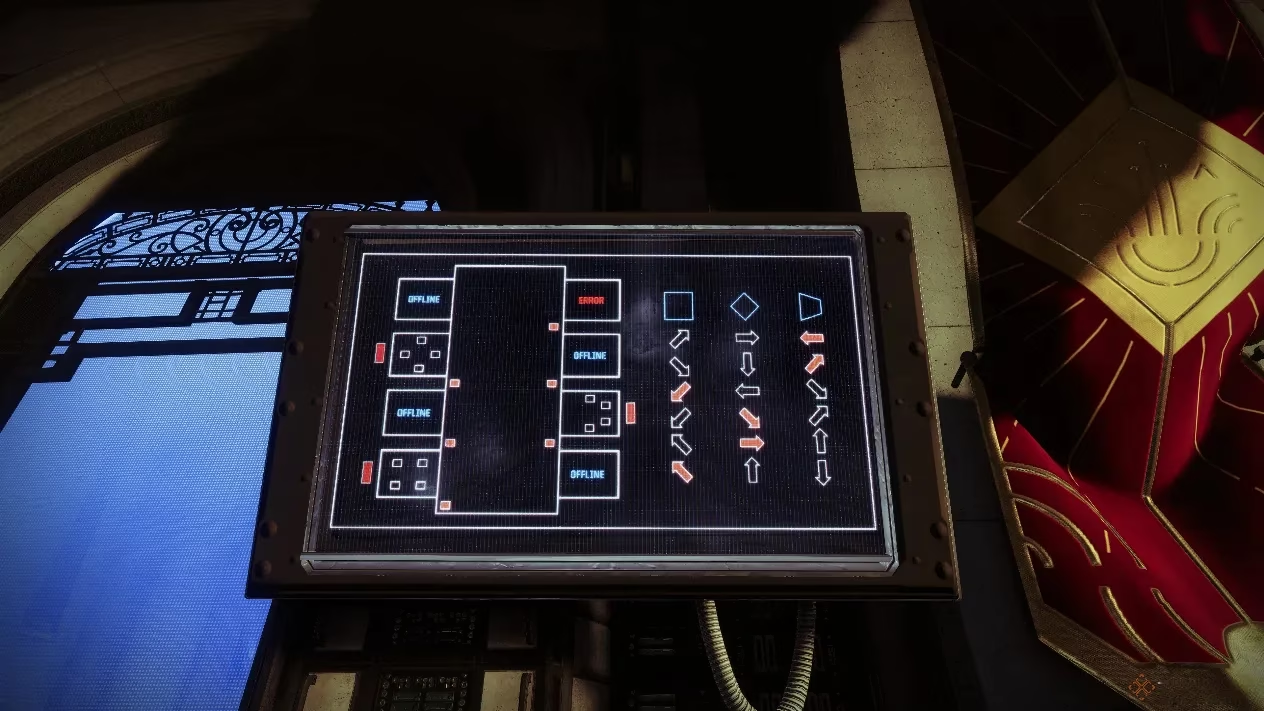
The Cryptarch's Vault Puzzles & The Vimana Junker Ship
For the true completionists, there's a secret ship to earn: the Vimana Junker. To get it, you must solve three weekly rotating puzzles in the Cryptarch's Vault over three weeks.
How it works:
-
Each week, three SIVA Holograms spawn in a specific mission area (Plaza, Covert Passage, or TR3-VR Maze).
-
You must find and shoot them with Outbreak Perfected in a specific, randomized order.
-
Once you see "Sequence Accepted," proceed to the vault.
-
A monitor in the vault's southwest corner shows symbols and colored arrows.
-
Match the symbol to a room in the vault (Square, Diamond, or Trapezoid).
-
In that room, input the code sequence shown by the arrows.
Complete all three puzzles across three weeks, and the sleek Vimana Junker ship is yours. It's the ultimate flex for conquering one of Destiny 2's most iconic and challenging missions.
Zero Hour is back, and it's as demanding and rewarding as ever. Whether you're a new Guardian seeking a legendary weapon or a veteran chasing the perfect ship, this mission demands your best. Eyes up. The Tower awaits its reclamation.