Destiny 2 Vexcalibur Exotic Glaive Solo Guide – Complete NODE.OVRD.AVALON Walkthrough
Master the solo Vexcalibur exotic quest in Destiny 2 with this Hunter build guide and weapon picks.
Back in 2023, when Lightfall shook things up, a hidden Exotic mission dropped that still gives Guardians fits today – especially if you’re running it solo. The reward is Vexcalibur, a Vex glaive that slaps a Void overshield on you whenever you block incoming fire. To claim it, you need to crack the “NODE.OVRD.AVALON” quest, a gauntlet of puzzles, multiple boss phases, and some truly sneaky platforming. Having just cleared it alone on a Hunter, I’m going to walk you through every step, sharing the exact builds, weapon picks, and survival tricks that got me to the War Table.
Fair warning: the mission recommends a Power level of 1800. If you’re lower – back then I was around 1785 – the game bumps you up to 1790 inside the mission, but that still leaves you under-level. Bring a fireteam if you can, but if you’re stubborn like me, the solo experience is absolutely doable.
Weapons, Enemies, & Suggested Builds
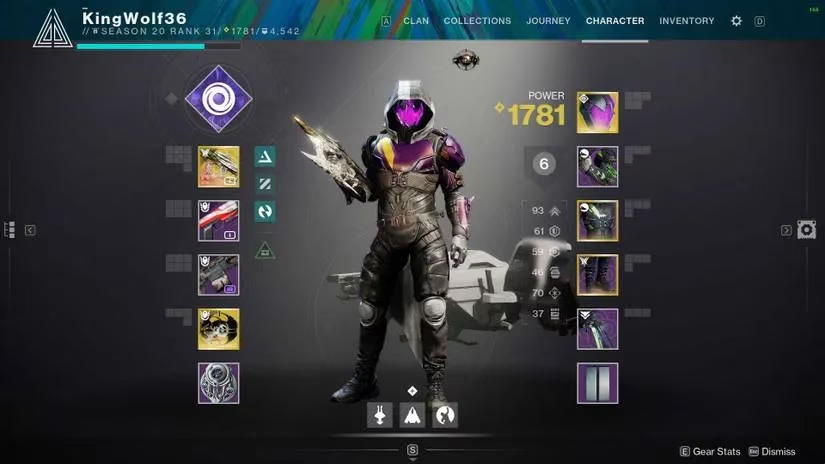
I leaned hard on two Hunter subclasses: Strand for crowd control and Void for sustain during boss fights. With the right fragments and a few exotic toys, you’ll have a build that can handle swarms of Vex and still put out serious single-target damage. Below are the exact setups I used.
Strand Hunter Build
-
Super: Silkstrike
-
Aspects: Widow’s Silk, Ensnaring Slam
-
Abilities: Marksman Dodge, Triple Jump, Threaded Spike, Grapple
-
Fragments: Thread of Ascent, Thread of Finality, Thread of Binding, Thread of Evolution
The Strand Super melts huge packs when Vex legions pour into a room. Grapple also becomes essential for traversal – you’ll see why later.
Void Hunter Build
-
Super: Moebius Quiver
-
Aspects: Stylish Executioner, Vanishing Step
-
Abilities: Marksman Dodge, Triple Jump, Snare Bomb, Vortex Grenade
-
Fragments: Echo of Obscurity, Echo of Expulsion, Echo of Leeching, Echo of Dilation
Void invisibility is your panic button. It buys time to reload, regenerate health, or collect Motes. If you have the Graviton Forfeit exotic helmet, slap it on – it extends invisibility and makes finishing enemies even more rewarding.
Weapon recommendations:
-
Osteo Striga (Exotic SMG) – an absolute workhorse for boss damage and add clear when playing solo. Its poison over-spread trivialises the final encounter.
-
A Rocket Launcher or Linear Fusion Rifle in the Power slot to chunk down the bosses during damage phases.
-
If you skip Osteo Striga, Deterministic Chaos machine gun is a fantastic alternative for the final fight.
Starting The NODE.OVRD.AVALON Exotic Quest
The quest begins in the EDZ, in The Gulch. You’ll spot several small floating Vex cubes scattered around the area, each humming louder as you get close. Your job is to collect all six cubes within a strict time limit.
Use the map above as a reference – I numbered the cubes in the order you should grab them. Always start with cube 1 and follow the sequence to cube 6. You must physically touch the cubes; shooting them does nothing. That’s where your Strand Grapple comes in, because a couple of cubes hover way up high. When you grab the first cube, a 30-second timer kicks in. Every subsequent cube resets the timer to 30 seconds. Once all six are collected in time, a full six-part code flashes on your screen – that’s your green light.
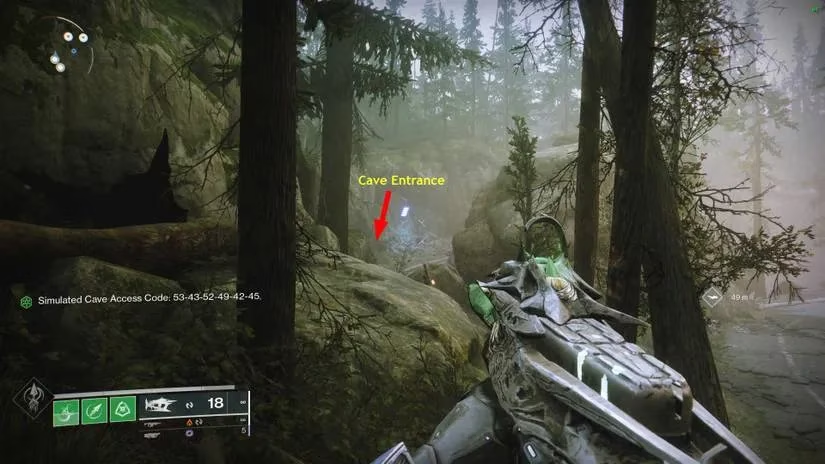
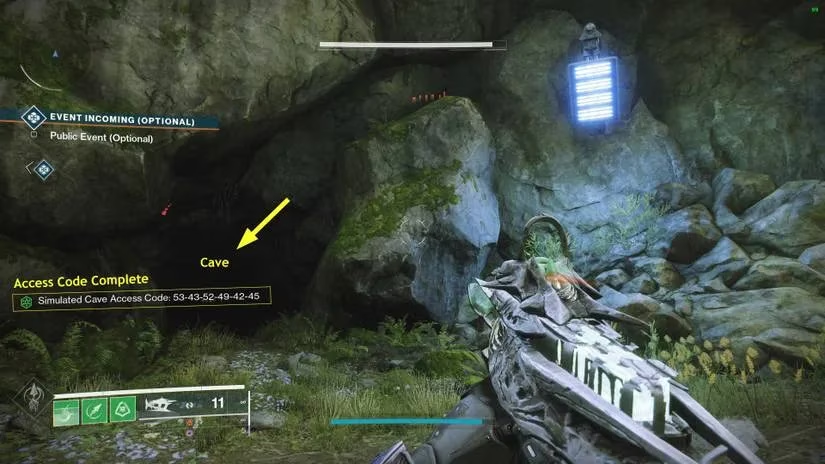
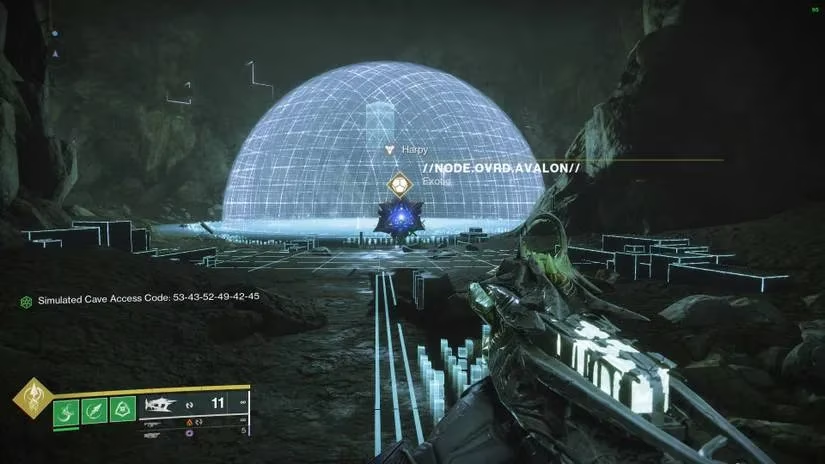
Now, stand where Vex cube 1 was and head a few paces southwest. Look for a large lamp hanging from a rocky ledge – I marked it as Location X on the map. Right beside it, a cave mouth opens. Go inside, follow the tunnel, and you’ll eventually find a friendly Harpy. Interact with that shiny bird to launch the Exotic mission.
Navigate To The First Puzzle
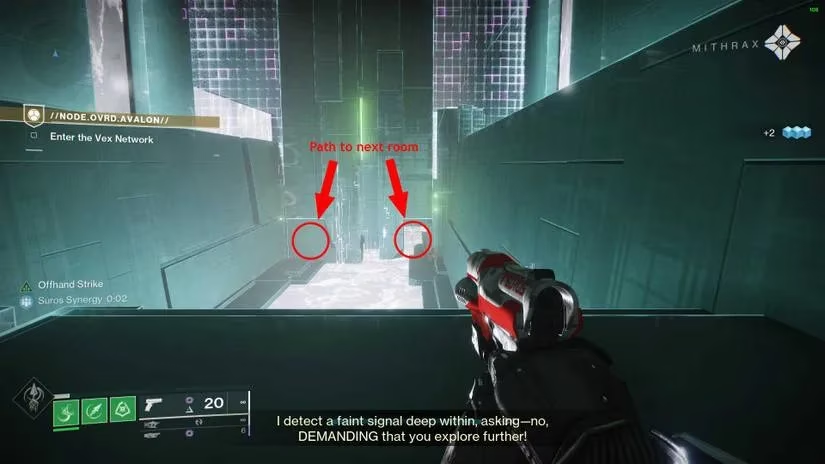
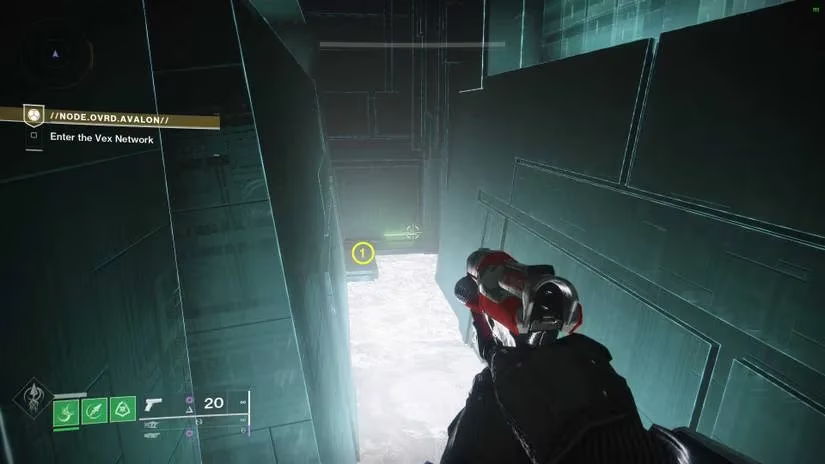
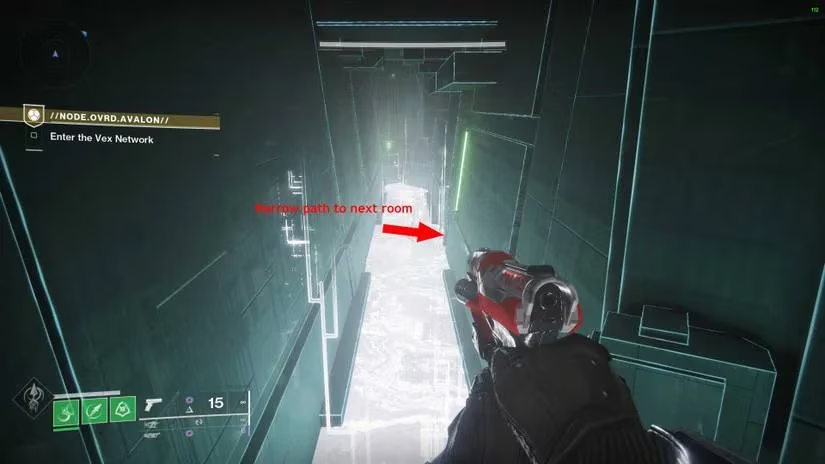
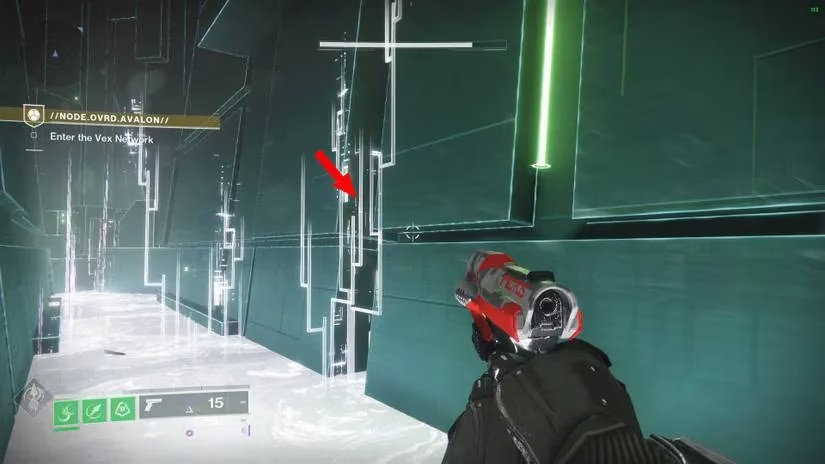
The mission won’t hold your hand with objective markers. Instead, look for faint green dots of light painted on walls and floors. After the air tunnel, you’ll land in a room with a pool of white Vex fluid. Two small openings at the base of the wall let you pass through. In the next corridor, turn left and drop down toward two Harpies. Kill them, but don’t go straight – check the right wall for a green light bar. Beside it is an incredibly narrow passage you’ll need to squeeze through.
A holographic person appears ahead and vanishes as you approach. That’s your confirmation you’re on the right track. Keep descending until you’re above a massive Vex milk container. Jump into the white liquid – you’ll be teleported to a new arena where the first real puzzle awaits.
“Enter The Access Code” Puzzle Solution
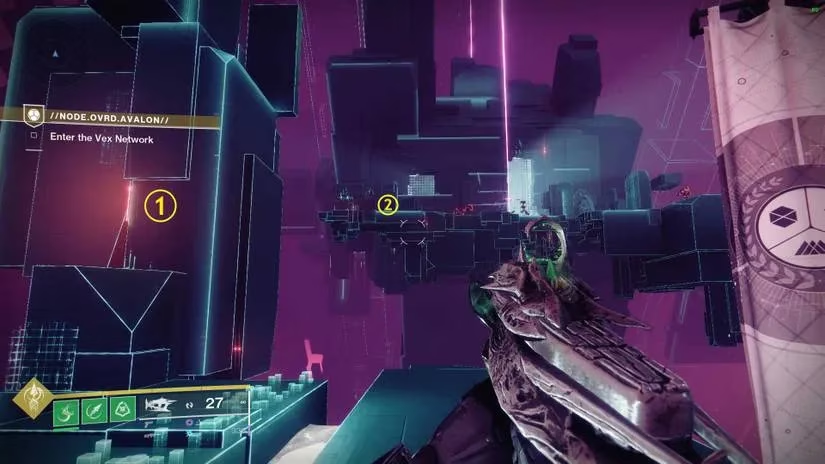
This pattern puzzle recurs multiple times, including during the final boss, so learn it well. In the centre of the room stands a purple pillar surrounded by three rotating shapes: a cube, a pyramid, and a bipyramid (octahedron). Somewhere in the area is a pattern – a vertical sequence of those shapes – that tells you the order in which you must shoot them.
You need to solve the puzzle three times per room. The pattern moves to a different spot each time, so scout around. I’ve marked the possible locations in the images below.
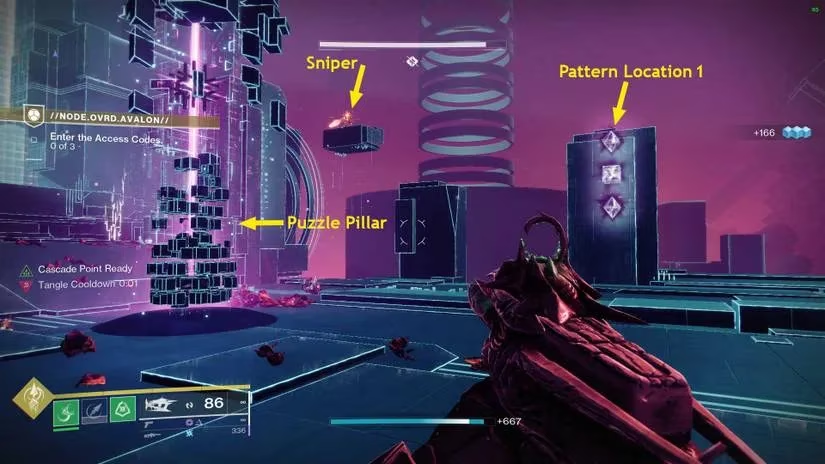
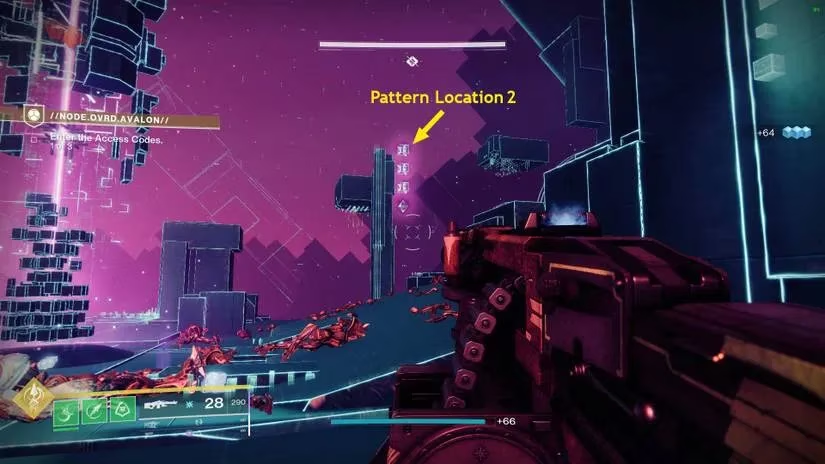
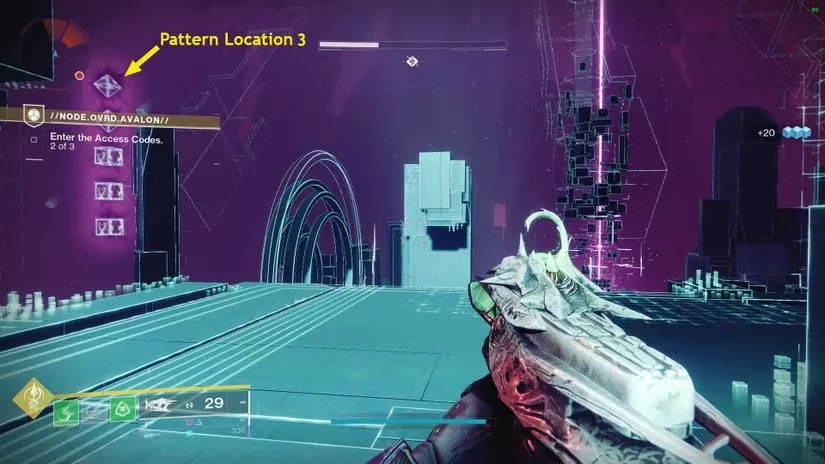
How to solve it:
-
Find the pattern and memorize the order from top to bottom. Write it down if you need to.
-
When a shape that matches the next entry in your pattern appears on the pillar, shoot it once.
-
Shooting the correct shape doesn’t remove it from the cycle; you just advance the sequence. If you miss a shape because you’re busy killing adds, don’t worry – wait for it to rotate back and shoot it then.
-
If you shoot the wrong shape, the pillar emits an alarm noise, your progress resets, and the pattern changes position. You’ll need to find the new pattern and start over.
After three successful rounds, the room’s back door opens and a Vex army rushes in. Unleash your Strand Super to clean them up. The second puzzle room works exactly the same way – three more patterns, plus a Cyclops and respawning Hobgoblin snipers. Snipe the red-bars first, then focus on the puzzle.
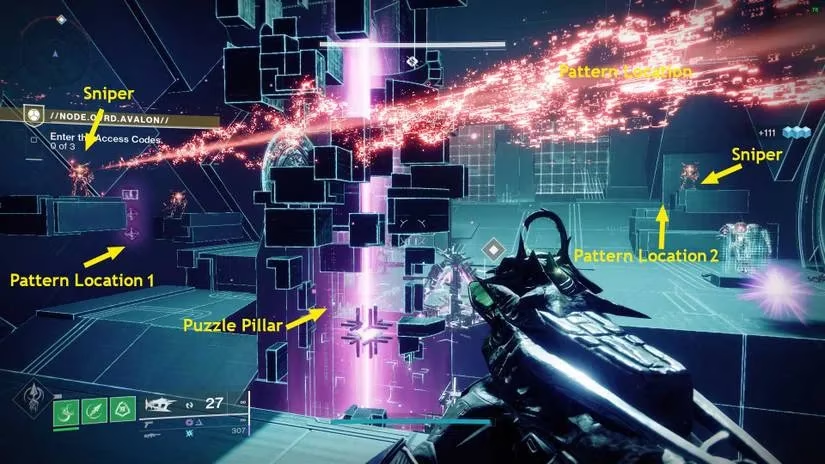
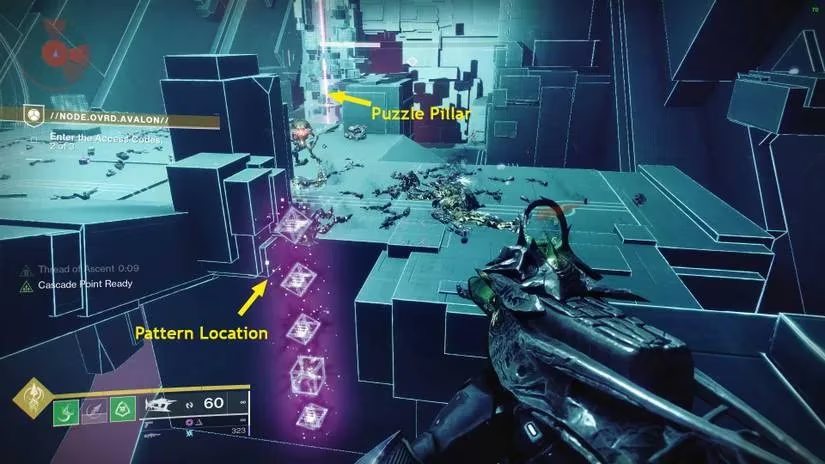
Once the second room is complete, a bigger wave crashes in, this time featuring Digital Variant Tracker and Digital Variant Neutralizer mini-bosses. Lean on your Super and heavy weapon to clear the room so you can move on.
Navigating To The First Boss Encounter
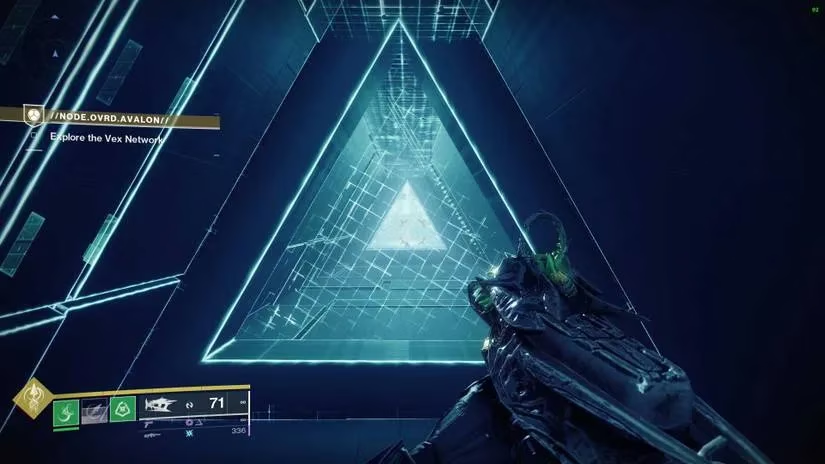
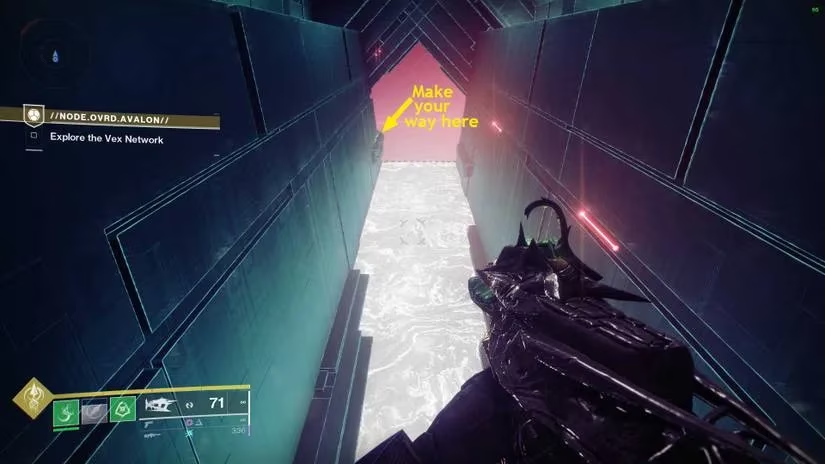
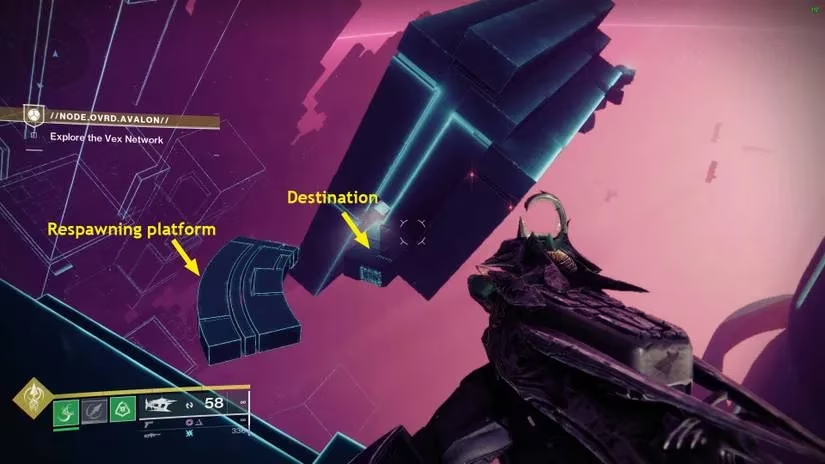
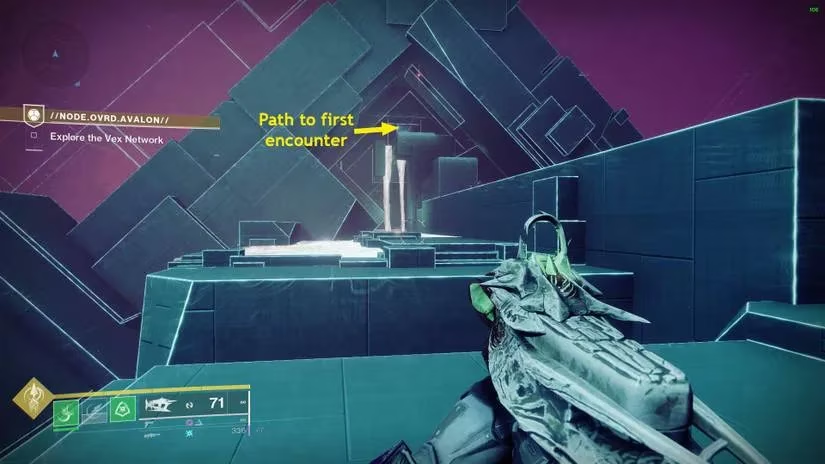
With the enemies dead, Vex walls retract. Go left, follow the platform past the holographic person, and hop onto a narrow ledge. You’ll find a tiny triangular opening above a Vex waterfall – beware of the sliding doors that can crush you. Crawl through, then look to your left for a pair of flashing platforms over a Vex river. Time your jumps carefully, and make sure you have Strand Grapple equipped before you drop down.
A sloping narrow path follows, and you must use Grapple to cross it. Aim for the far end as your anchor and jump at the end of the pull to avoid falling. Ride the floating platforms to the rally banner, then step onto the spherical platform to enter the first boss arena.
First Boss Encounter – Data Nullifier
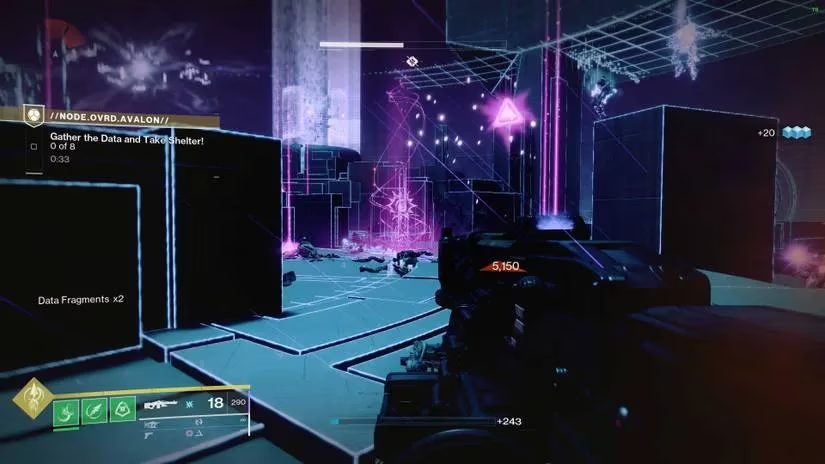
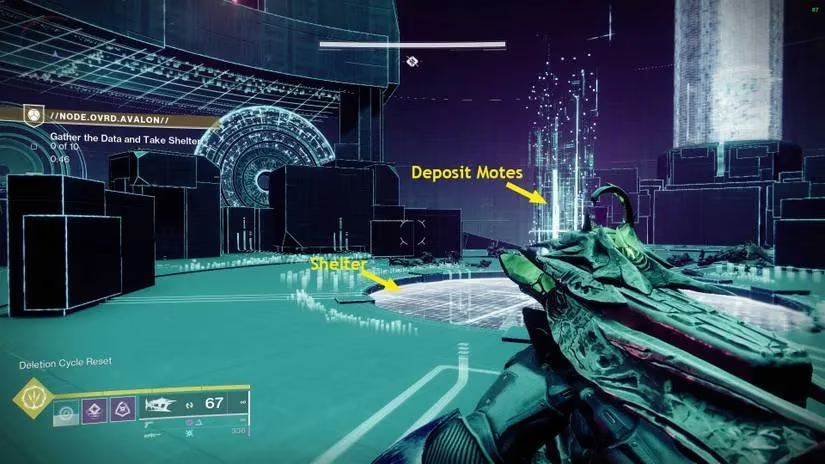
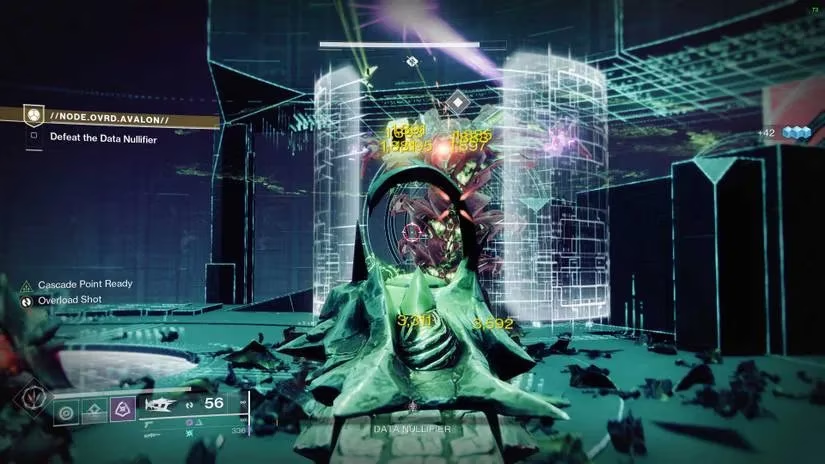
This encounter mixes Mote banking with survival. A hole in the floor, covered by a Vex glass, has a pillar on top. Your goal is to kill Dataholder (Corrupted) enemies, who drop purple Motes. Gather 8 Motes and deposit them in the pillar to open the shelter below. You must be inside the shelter before a wipe timer hits zero. Then you pop back up, needing 10 Motes the second time. After the second shelter phase, you face the boss, Data Nullifier, a shielded Harpy surrounded by smaller Harpies.
Use Vortex Grenades to cluster Dataholders, and Void invisibility to safely grab Motes. Hobgoblin snipers spawn each shelter round, so pick them off quickly. The boss itself falls fast to Osteo Striga or Moebius Quiver. After depleting its first health bar, you’ll need to do the shelter dance two more times with 12 Motes to trigger the final damage phase and kill it.
Navigating To The Final Boss
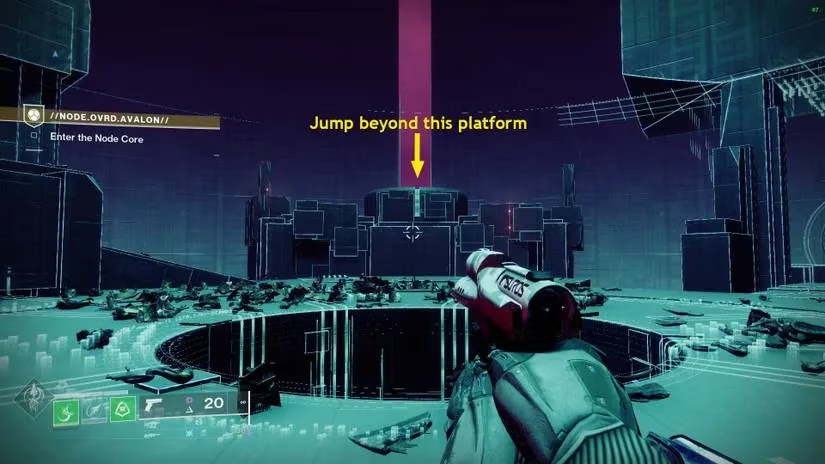
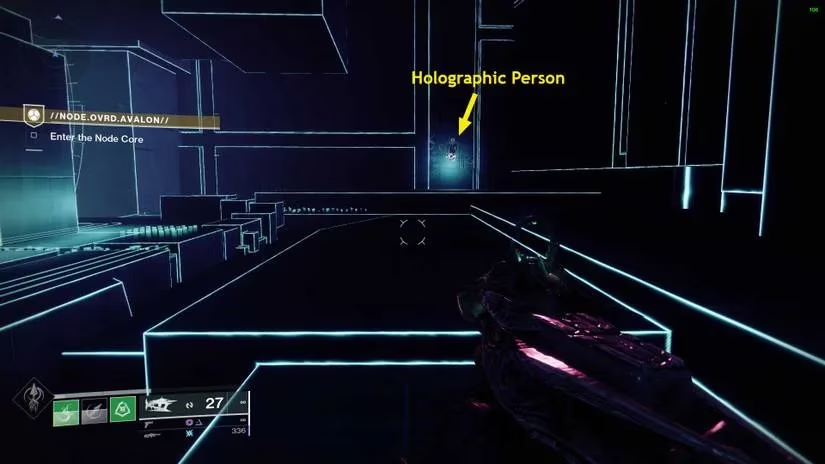
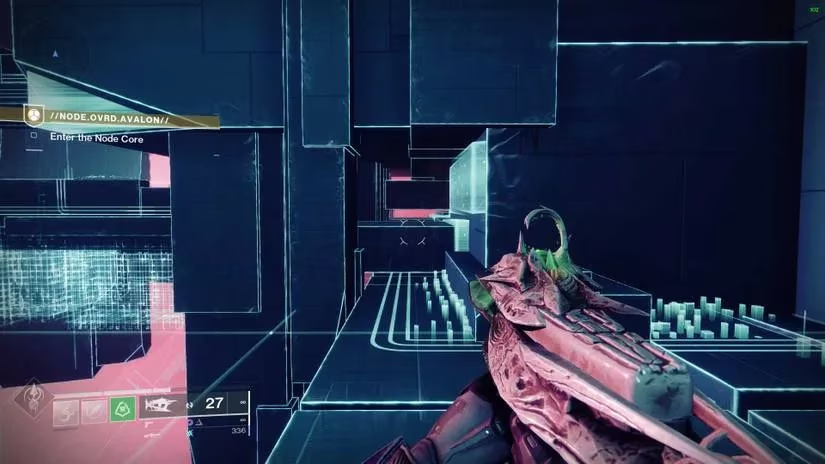
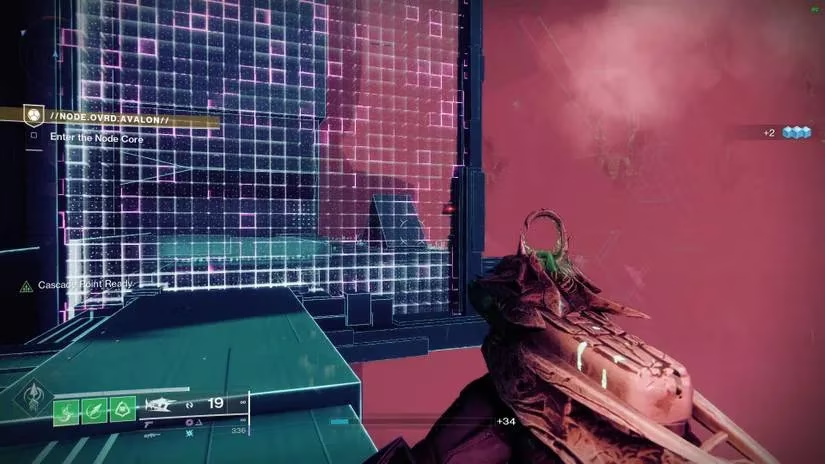
From the first boss room, look for a platform with three red dots. Beyond it, a narrow route leads to a Wyvern. Dispatch it and follow the holographic person across a jagged edge. The next corridor is littered with periodic pushing obstacles – a well-timed Grapple will zip you past them. A spherical platform sends you deeper into the Vex network. Drop down a slope, land on a long hallway, and you’ll step into the final showdown.
Final Boss – Variant Stalker Brakion, Repurposed Mind
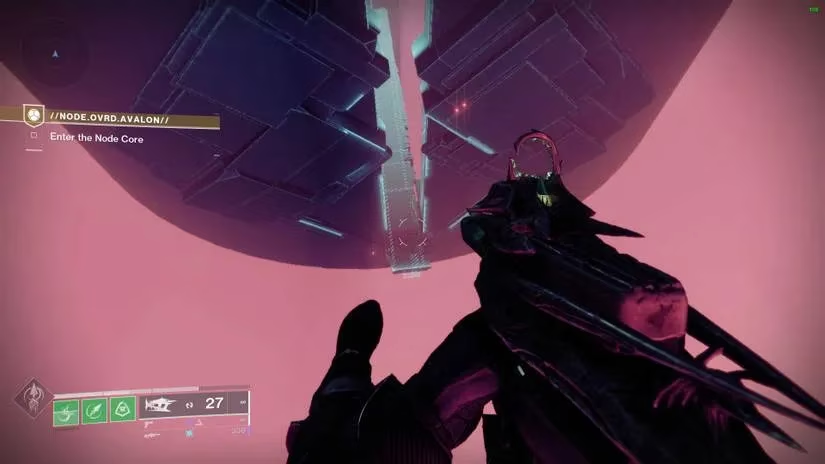
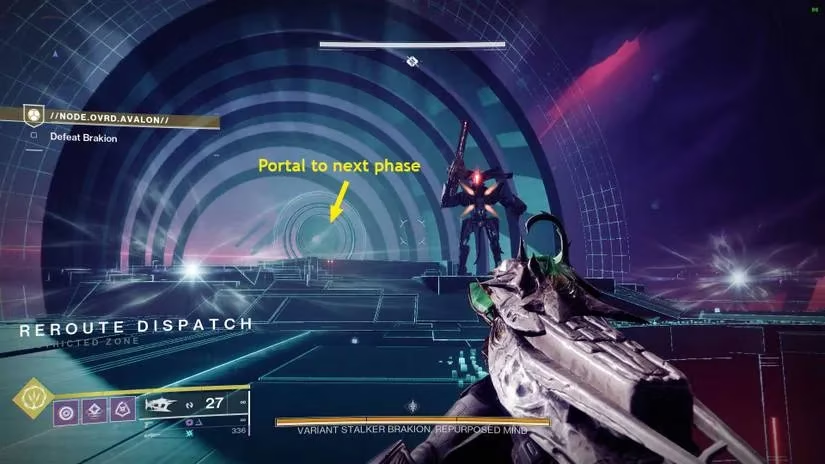
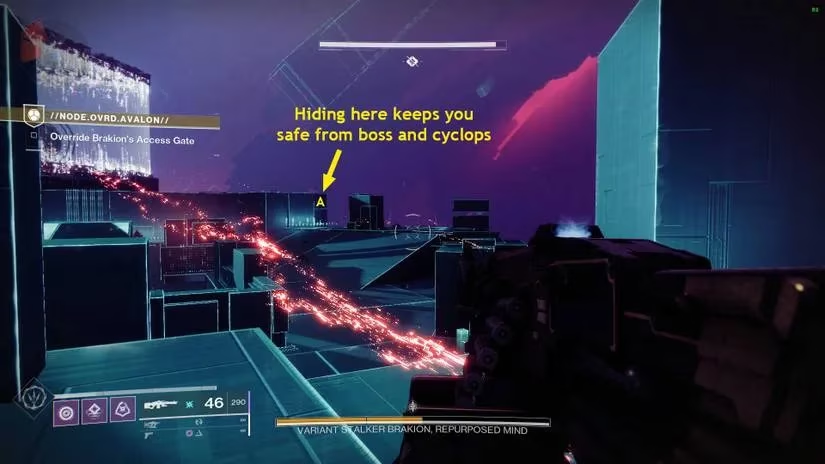
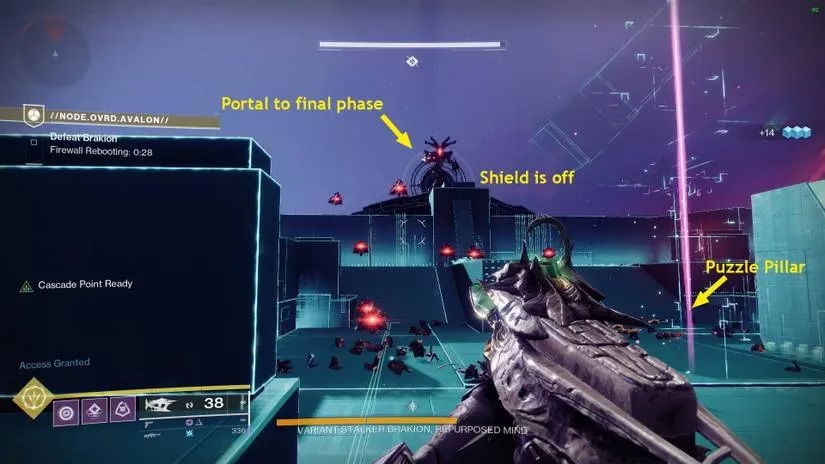
This fight has three phases with no checkpoints, so death means a full restart. I went full Void here for the constant invisibility.
Phase One – Kill the Wyverns First
You drop onto a triangular platform with three anchor points. The boss teleports between them while Goblins, Minotaurs, and Quantum Wyverns swarm you. Those Wyverns can launch you off the platform, so they are priority number one. After they’re gone, unload Osteo Striga and Moebius Quiver into Brakion. Once the first health bar is empty, the boss vanishes, clean up the remaining adds, and step into the portal on one of the anchors to start Phase Two.
Phase Two – Solve the Puzzle & Survive
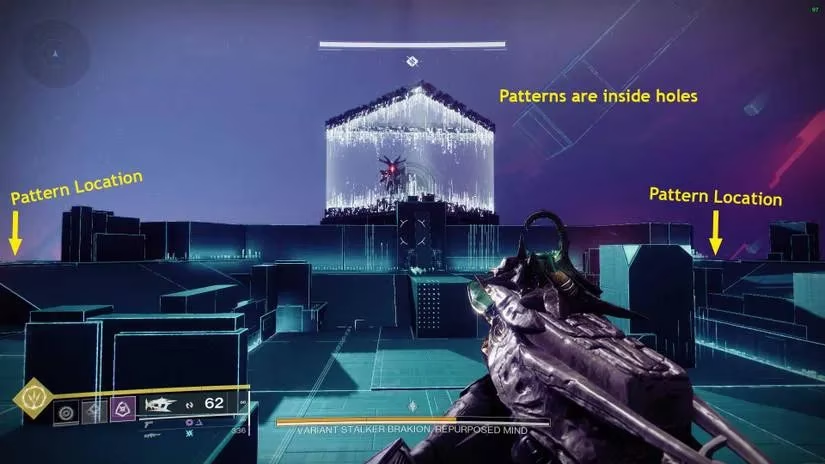
This is the toughest part. The boss is caged and immune, lobbing Void bombs at you. You need to solve one instance of the shape puzzle to drop the shield. First, kill the Quantum Wyverns again, then the Harpy mini-boss. Two Cyclops spawn on either side – snipe them quickly. Now find the pattern. The two possible locations are shown in the image above; they hide behind Vex glass. Approach, memorize the T-shaped sequence, and shoot the matching shapes on the pillar that appears.
I recommend inserting all patterns except the last one, then duck behind wall “A” (marked in the image above). That spot shields you from the boss while you wait for abilities to recharge. Insert the final pattern and you’ll have 30 seconds to damage the boss before the shield regenerates. A strong Linear Fusion Rifle can finish this phase in two cycles, though it took me three with Osteo Striga.
Phase Three – Stay On The Move
The boss has no more shields, but he chases you aggressively. Keep moving. Leave some Goblins or Minotaurs in a Finisher state – when you need invisibility and your dodge is on cooldown, finish one for a quick escape. Aim for the glowing core on his belly: that’s the weak spot. An SMG or Machine Gun is perfect here. Maintain constant motion, and you’ll wear him down.
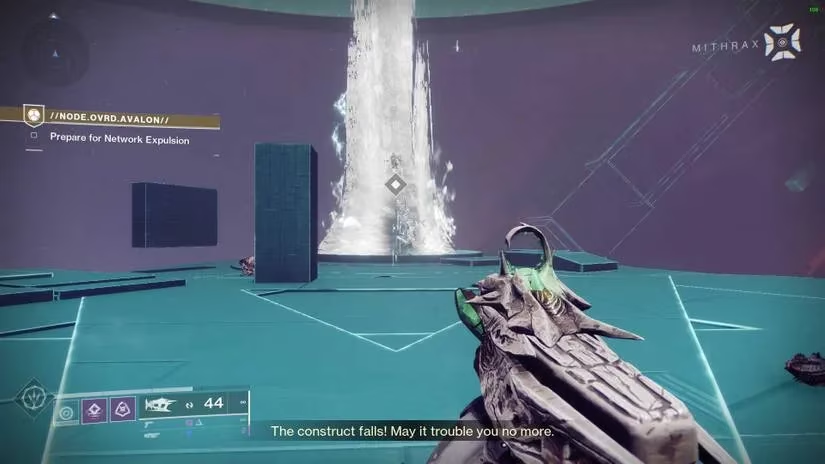
Once Brakion falls, interact with the Vexcalibur in the room to end the mission.
Visit The War Table & Claim Your Prize
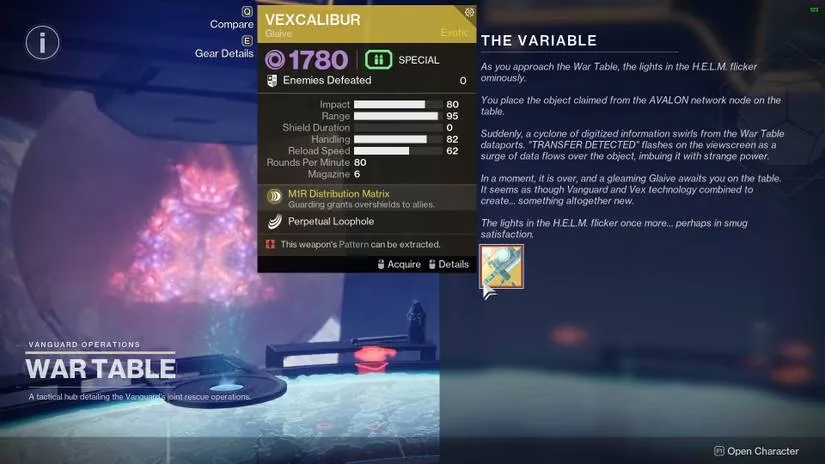
Head to the H.E.L.M. and approach the War Table. You’ll receive Vexcalibur, a legendary quest to net Vex final blows with the glaive, and an Authorization Override mod upon finishing that quest. You also net four Triumphs for your troubles – a nice bonus.
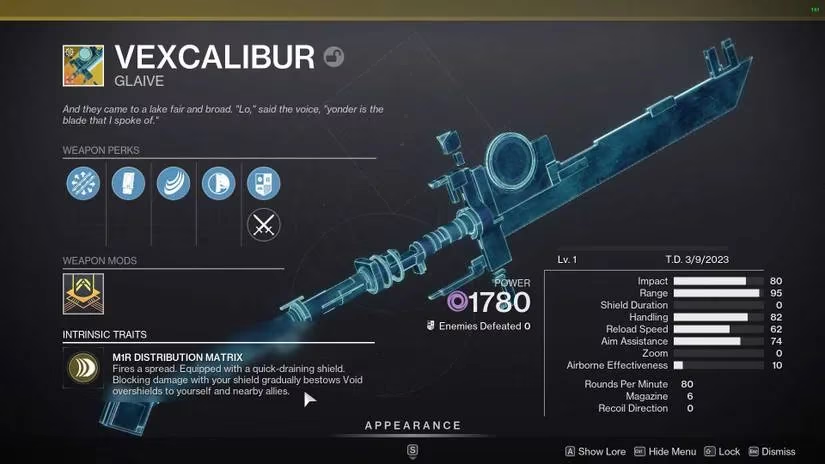
Even in 2026, the Vexcalibur remains a standout tool for defensive builds. Whether you’re blocking boss stomps or giving your fireteam overshields mid-fight, this glaive is well worth the effort. Good luck, Guardian – and keep that Grapple handy.
This assessment draws from HowLongToBeat to help set expectations for a solo “NODE.OVRD.AVALON” run like the one described above—because endurance is part of the challenge when you’re juggling repeated shape-code puzzles, mote banking under wipe timers, and a three-phase Brakion fight with no checkpoints. Using completion-time context can make it easier to plan attempts (e.g., budgeting extra time for safer, invis-heavy Void play in Phase Two rather than riskier speed clears), decide when to reset after early mistakes, and choose loadouts that reduce downtime between damage windows.