K1 Logistics Legend Lost Sector Guide 2026: Tips & Loadouts
Master the Destiny 2 Moon's K1 Logistics Lost Sector solo with top-tier Arc and Solar builds against relentless Fallen.
Three years and a dozen expansions later, the Moon’s K1 Logistics Lost Sector still stands as one of the weirdest solo challenges in Destiny 2. I\u2019ve been farming this place since Shadowkeep, and trust me—even in 2026, the Fallen inside haven\u2019t found a new hobby. They still swarm you like it\u2019s a discount Spider sale. But with a few tactical tweaks and the right murder toys, you\u2019ll stroll through that final boss like you own the place.
Before we jump into the action, let\u2019s talk about the house guests you\u2019ll be evicting. The Fallen have turned K1 Logistics into their personal Rave in a Cave, complete with laser gates and a boss with a serious case of pillar-hugging.
\ud83d\udcbd Enemy Hit List
You won\u2019t find every flavor of Champion here, but the mix is nasty enough: Barrier Servitors and Overload Captains. And they brought friends.
| Enemy Type | Count / Note |
|---|---|
| Barrier Servitor | x3 – big purple pain orbs |
| Overload Captain | x2 – teleporting jerks |
| Nightmare of Kelnix Reborn | Boss – health bar in thirds |
| Marauders, Vandals, Dregs | cannon fodder with attitude |
| Shanks, Tracer Shanks, Exploder Shanks | tiny flying death nuggets |
| Nightmare Shank, Nightmare Dreg | extra spicy adds in boss room |
| Captains, Wretches | general nuisance |
What makes this place a fresh hell is the boss arena—it\u2019s open, completely open. You\u2019ll get shot from three different zip codes if you\u2019re not careful. The trick? Fight dirty. Stay in corridors, peek like a coward, and let the adds make the first mistake.
\ud83d\udee0\ufe0f Best Builds & Loadouts (2026 Edition)
Arc and Solar are your best friends here because the Fallen love throwing Arc and Solar shields at you. Void? Leave it in the Tower. It\u2019s the active Threat, so you\u2019ll get deleted faster than a blueberry in a GM.
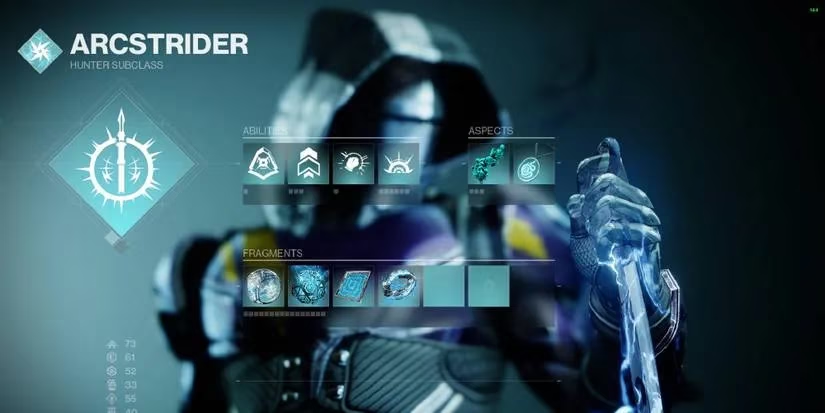
\u26a1 Hunter (Arc)
-
Super: Gathering Storm – stick it on the boss and watch him panic
-
Dodge: Marksman\u2019s Dodge (reload + survive)
-
Melee: Combination Blow (punch everything, heal)
-
Grenade: Storm Grenade (roombas of doom)
-
Aspects: Lethal Current, Flow State
-
Fragments: Spark of Volts, Instinct, Feedback, Shock
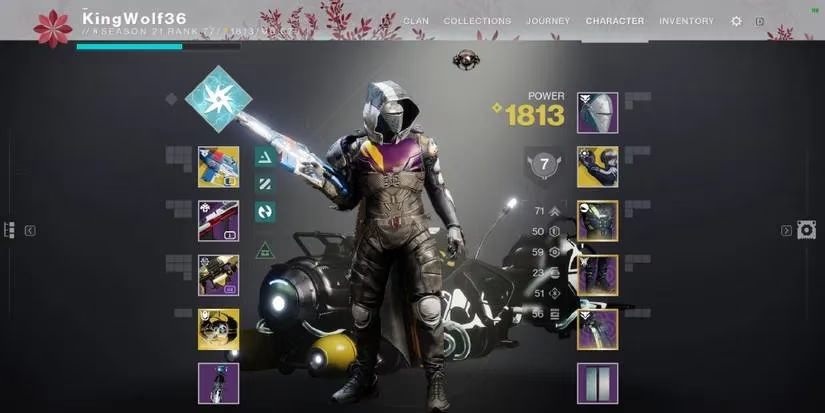
\ud83d\udd25 Titan (Solar)
-
Super: Hammer of Sol – still melts in 2026
-
Barricade: Towering (hide and cry)
-
Melee: Throwing Hammer (bonk clinic)
-
Grenade: Solar Grenade (zone control)
-
Aspects: Roaring Flames, Sol Invictus
-
Fragments: Ember of Resolve, Beams, Blistering, Char
\u26a1 Warlock (Arc)
-
Super: Chaos Reach – delete a Servitor from across the map
-
Rift: Healing (your panic button)
-
Melee: Ball Lightning (zap)
-
Grenade: Storm Grenade
-
Aspects: Arc Soul, Lightning Surge
-
Fragments: Spark of Volts, Shock, Recharge, Magnitude
\ud83d\udd2b Weapon Loadout
Don\u2019t overthink the ranges—you\u2019ll be fighting from mid-to-long sightlines. Anti-Barrier Auto Rifle or Scout is mandatory; Overload Scout or Trace Rifle is your best friend for those twitchy Captains.
Kinetic Slot
-
Best: Suros Regime (Exotic Auto) or Transfiguration (Scout)
-
Alternatives: Perpetualis (Auto), Servant Leader (Scout)
Energy Slot
-
Best: Centrifuse (Exotic Auto \u2013 still slaps in 2026) or Staccato-46 (Scout)
-
Alternatives: Positive Outlook (Auto), Pleiades Corrector (Scout)
Power Slot
-
Best: Unwavering Duty (Machine Gun)
-
Alternatives: Laser Painter (Linear Fusion), Cold Comfort (Rocket)
Pro tip: If you snagged the new seasonal Arc trace rifle \u201cSparkplug,\u201d it shreds Overloads while making you feel like a Stormcaller demigod.
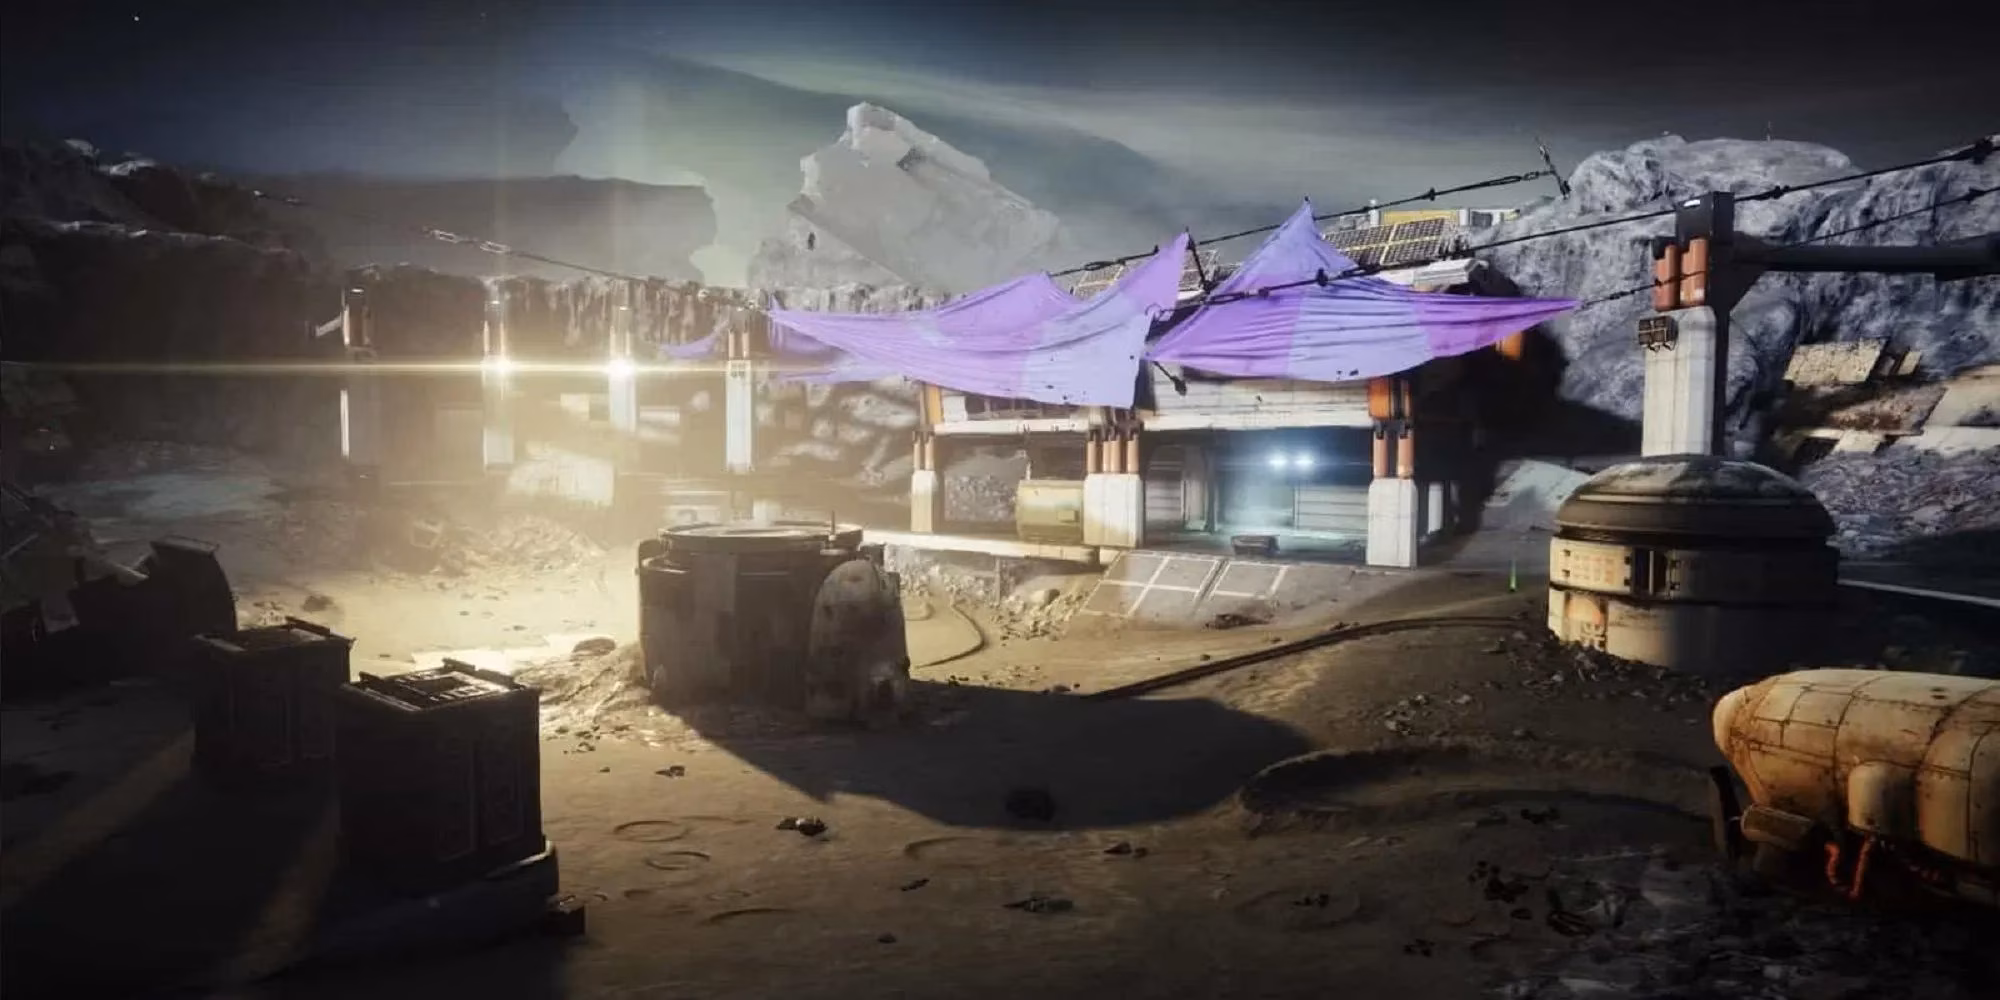
\ud83d\udee4\ufe0f Walkthrough: From Laser Gates to Loot Chest
Entrance: That First Barrier Servitor
When you spawn in, a Barrier Servitor is floating right in front of you like a bouncer at the wrong club. Ignore it completely and turn left into the corridor with laser gates. Shoot the glowing battery on the wall to blow them up (safety first, kids).
You\u2019ll meet a few Marauders, but the real party starts when you spot the pack of enemies shielded by that same Servitor. Hug the marked box on your left\u2014do not push forward. Plink the Servitor until it shields, break the barrier, and then go ham on the unprotected adds. If you stand too close, the floaty purple jerk will teleport to a balcony behind you, and then everyone will hate their life. Also, clear the Vandals on the balcony before they turn you into a pincushion.
Pushing Up: Shank Rain and an Overload Captain
After the Servitor pops, head up to the platform. A wave of Shanks and Tracer Shanks will greet you; clear them, then brace for a swarm of Exploder Shanks\u2014they fly at you faster than a Stompees Hunter in Quickplay. From this platform you can see an Overload Captain on the opposite balcony and another Barrier Servitor down below. Always kill the Servitor first. The Overload Captain will run away and heal the moment you break line of sight, so don\u2019t give him the satisfaction.
Once the Servitor is down, move to the balcony\u2019s edge and use the low cover to melt the Overload Captain. In this spot he has nowhere to teleport. Works every time.
Corridor of Doom: The Second Overload Captain
Head into the curved hallway leading to the boss arena. Halfway through, another Overload Captain will start blasting you like he\u2019s auditioning for the role of \u201cannoying.\u201d Hug the corridor walls, abuse cover, and if you have your Super, now\u2019s the time to light him up. Don\u2019t be a hero \u2013 you\u2019ll need your Super for the boss, but this corridor is cramped enough that you can burst him down and still have energy for the final fight.
Boss Arena: The \u201cStay Inside\u201d Strategy
DO NOT step out into the open area yet! Stand inside the corridor gate and look for the third and final Barrier Servitor lurking next to the boss. As long as you stay inside, the boss fight won\u2019t trigger. Kill the Servitor calmly, reload everything, and take a sip of your drink.
Now step out briefly to trigger the boss (Nightmare of Kelnix Reborn) and then scurry back into the corridor. You\u2019ll see his health bar is divided into three segments. During the first third he stands in the middle like a brave idiot\u2014ez headshots. For the second and third segments he\u2019ll hug the pillars on the left or right. That\u2019s when you\u2019ll need to leave your safe corridor. But before you do, kill the Captain, the Nightmare Shank, and the Nightmare Dreg hiding behind cover on the opposite side. Those adds are the real threat.
Once they\u2019re dead, the boss is just a big target. Pop your Super, rotate to get line of sight, and don\u2019t stand still. He\u2019ll go down faster than your Vanguard reputation when you forget to visit Zavala.
Loot chest appears on the opposite side of the arena from where you entered. Open it, pray for a god-roll Exotic, and feel that sweet relief.
\ud83c\udf1f Final Pep Talk
K1 Logistics isn\u2019t hard because of the boss\u2014it\u2019s hard because it punishes impatience. Treat every room like a hide-and-seek game where only you get to shoot. With these builds and the \u201cnever leave the corridor unless absolutely necessary\u201d philosophy, you\u2019ll add this Lost Sector to your weekly rotation faster than you can say \u201cLucent Hive.\u201d See you on the Moon, Guardian. Bring snacks.